Showing posts with label breads. Show all posts

Tuesday, April 12, 2022

Recipe: Braided Easter Egg Bread

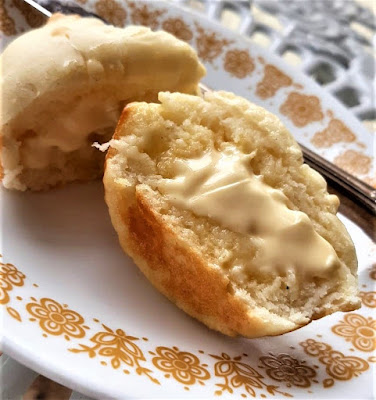
I made this pretty braided bread last year to serve with lunch on Resurrection (Easter) Sunday. Even though I didn't get my ends sealed good and it kind of came apart on the back side, it still turned out nice. It was really good and everyone liked it! I thought I'd share the recipe with you here in time for Resurrection (Easter) Sunday this year! 🐇

Braided Easter Egg Bread

Do not cook the whole eggs. They will bake at the same time the bread does. The eggs can be dyed for extra color, if you desire.

BRAIDED EASTER EGG BREAD

2 1/2 cups flour, divided
1/4 cup sugar
1 teaspoon salt
1 package (2 1/2 teaspoons) active dry yeast
2/3 cup milk
2 tablespoons butter
2 eggs
5 whole eggs, dyed if desired
2 tablespoons butter, melted

In a large bowl, combine 1 cup flour, sugar, salt, and yeast; stir well. Combine milk and butter in a small saucepan and heat until milk is warm and butter is softened but not melted. 

Gradually add the milk and butter to the flour mixture; stirring constantly. Add two eggs and 1/2 cup flour; beat well. Add the remaining flour, 1/2 cup at a time, stirring well after each addition. When the dough has pulled together, turn it out on a lightly floured surface and knead until smooth and elastic.

Lightly grease or oil a large bowl (or spray with pan spray); place the dough in bowl and turn to coat. Cover with a damp cloth and let rise in a warm place until doubled in volume, about 1 hour.

Deflate the dough and turn it out onto a lightly floured surface. Divide the dough into two equal size rounds; cover and let rest for 10 minutes. Roll each round into a long roll about 36-inches long and 1 1/2 inches thick. Using the two long pieces of dough, form a loosely braided ring leaving spaces for the five colored eggs. Seal the ends of the ring together and use your fingers to slide the eggs between the braids of the dough.

Preheat oven to 350 degrees F (175 degrees C). Place loaf on a buttered baking sheet and cover loosely with a damp towel. Place loaf in a warm place and let rise until doubled in bulk, about 45 minutes. Brush risen loaf with melted butter.

Bake in the preheated oven until golden brown, about 30 minutes. 

Yield: 1 1-pound loaf
Servings: 10

Braided Easter Egg Bread Before Baking

Until next time...
~Rebecca

Recent and related posts that you might enjoy reading...

Tuesday, February 16, 2021

Recipe - Good Earth Rolls

Sue Gregg's Good Earth Rolls are a family favorite. They taste great and are super healthy!


GOOD EARTH ROLLS

1. (Optional) Soak 1/3 cup sunflower seeds in water and let stand overnight (preferred) or while mixing dough.

2. Blend in a 2 cup glass measuring cup in order given and let stand until bubbles up (5 to 10 minutes):

   1/2 cup very warm (but not hot) water
   2 envelopes (2 tablespoons) active dry yeast
   1 teaspoon honey

If yeast mixture threatens to bubble over top of container before you are ready to use it, stir it down.

3. Meanwhile, blend in mixing bowl:

   1 1/2 cups very hot water (not boiling)
   1/3 to 1/2 cup honey
   1/4 to 1/3 cup olive or canola oil
   2 teaspoons salt

4. Add and stir vigorously with a wooden spoon about 3 minutes:

   1 1/4 cup hard white wheat flour or whole wheat flour
   dissolved yeast mixture

5. Add water, yeast, and honey mixture, as well as, the remaining flour as needed to prevent sticking while kneading about 10 minutes:

   2 cups hard white wheat flour or whole wheat flour or      
      unbleached white flour
   2 1/2 to 3 cups hard white wheat flour or whole wheat            flour
   sunflower seeds, drained, optional

6. Place dough in bowl, lightly grease top, cover, and let rise until double, about 1 hour.

7. Punch dough down in center with fist, knead down and divide in half. Shape each piece into 12 rolls.

8. Place rolls in greased pans so that they are barely touching. Let rise in warm place 15 to 20 minutes.

9. Bake at 400 degrees for 15-20 minutes. Brush rolls immediately after baking while hot with soft or melted butter. 

Makes 2 dozen rolls.

Until next time...
~Rebecca

Recent and related posts that you might enjoy reading...


Tuesday, March 24, 2020

Momma's Easy No Yeast Dinner Rolls

I made these yesterday (frightful looking things, aren't they?)...


I got the recipe from a meme that's been going around Facebook.

As you can see, my rolls don't look anything like those in the picture. I even left them in the oven an extra minute or two in hopes that they would brown on top, but they refused. The recipe calls for mayo, though, and I didn't have any, so I used Miracle Whip instead. That could have made a difference. 

We found the rolls to be a bit salty, so, next time I will only use 1/2 a teaspoon of salt instead of a whole one. 


Overall, the rolls were quick and easy (they tasted more like a biscuit than a dinner roll) and I would definitely consider making them again if I found myself in a pinch and needed a quick and easy bread to go with supper.

Until next time...
~Rebecca

Recent and related posts that you might enjoy reading...

Tuesday, November 4, 2014

Rustic Oat and Wheat Bread

Greetings, Dear Friends!

It's been forever since I've been with you. (At least it feels like it's been forever!)

Since going to work part-time, my life has been totally different and it's taken me a long, long time to adjust. I've been working since June and am just now working myself back into some normal-for-me-activities...like baking and blogging...neither of which I've not done for months, but both of which I am doing today.

It's autumn here in southwest Missouri and with the arrival of cool, damp weather my husband has had him a hankerin' for some good old-fashioned, homemade bread...specifically, his favorite, my Rustic Oat and Wheat Bread. He asked me last night if it might be possible to make a loaf or two for him soon. So, first this morning, I started baking and oh! How wonderful the house smells!

While I was at it I thought I might as well go ahead and share the recipe here. This is a great recipe for a hardy bread that is just made to go with wintertime soups and stews. If you end up trying it, I hope your family enjoys it as much as mine has over the years. It's simply delicious!

Until Next Time,
~Rebecca


RUSTIC OATS AND WHEAT BREAD

1 cup rolled wheat
1/4 firmly packed brown sugar
2 teaspoons salt
2 cups boiling water
1/4 cup molasses
3 tablespoons olive oil
2 packages active dry yeast
2/3 cup water heated to 105 to 115 degrees F.
4 3/4 to 5 3/4 cups unbleached flour
1 cup regular old-fashioned oats

Topping

1 egg, beaten
1 tablespoon old-fashioned oats

Spray two cookie sheets with cooking spray. In a large bowl, combine rolled wheat, brown sugar, salt, 2 cups boiling water molasses and oil; mix well. Cool to 105 to 115 degrees F. In small bowl, dissolve yeast in 2/3 cup water. Add to cooled rolled wheat mixture. Lightly spoon flour into measuring cup; level off. Add 2 cups flour to rolled wheat mixture. Blend at low speed until moistened; beat 2 minutes at medium speed. By hand, stir in 1 cup regular oats and 2 1/4 to 2 3/4 cups flour until dough pulls cleanly away from sides of bowl.

On floured surface, knead in 1/2 to 1 cup flour until dough is smooth and elastic, about 10 minutes. Place dough in greased bowl; cover loosely with greased plastic wrap and cloth towel. Let rise in warm place (80 to 85 degrees F.) until light and doubled in size, about 45 to 60 minutes.

Punch dough down several times to remove all air bubbles. Divide dough in half; shape into balls. Place on sprayed cookie sheets. With sharp knife, slash a 1/4 inch deep lattice design in top of each loaf. Cover; let rise in warm place until light and doubled in size, about 45 to 60 minutes.

Heat oven to 350 degrees F. Brush loaves with beaten egg; sprinkle with 1 tablespoon regular oats. Bake at 350 degrees for 35 to 45 minutes or until deep golden brown and loaves sound hollow when lightly tapped. Remove from cookie sheets; cool on wire racks. Makes 2 (16 slice) loaves.

Wednesday, April 16, 2014

Hearty Green Soup (E) and Joseph's Crackers/Chips (S, E or Fuel Pull)

THM's Hearty Green Soup and Joseph's Crackers/Chips
The Trim Healthy Mama's, Hearty Green Soup, is a large-scale soup intended for big families and company meals. According to the book, the recipe makes two meals worth of food, but, for just John and I, I made a half a recipe and it ran us for one meal a day for days, plus we had company join us on one of those days. The recipe may be found on page 334 of the Trim Healthy Mama, and you can use your own judgment as to whether to make a whole recipe or a half. That is totally up to you.  The recipe is absolutely delicious and very economical. This is definitely a soup that I will make again and again. (In fact...I've got a pot of split peas cooking right now!)

On several of the days that we ate this soup for lunch or supper, I served it with Joseph's Crackers/Chips (page 394 in the book). These crackers/chips are very good and have totally taken the place of tortilla chips in our home. They're also very quick and easy to make, and you can have a batch made up from start to finish in just a couple of minutes.

(Note: I have made the chips both ways...using pita bread and lavash...and, both are equally good. When using the pita bread, I cut them in half, then separate the two halves, so, when I cut them, I get 8 good-sized triangles out of each original half instead of just four. When using the lavash bread, I use a half a piece, then cut that half in half again and cut diagonally creating the desired, triangle, tortilla chip-shaped pieces. Very yummy! And, since I didn't have any paper plates on hand, I made mine on a regular plate linesd with parchment paper.)

I hope you enjoy trying these recipes out. They're both very good and totally nutritious!

Until Next Time,
~Rebecca

#thm

Sunday, October 27, 2013

Recipes For Sourdough Starter, Pancakes, and Biscuits

An old friend contacted me tonight wanting to know if I had a recipe for sourdough starter...which I did (and do!)...and though I've shared these recipes before, I thought I'd share them again here because it got me excited! So excited, in fact, that I've got a fresh batch of sourdough starter making in the kitchen right now! :)


SOURDOUGH STARTER

1 package active dry yeast
1/4 cup lukewarm water (potato water is good)
2 cups warm water
1 1/2 cups flour
1 tablespoon sugar

Using a quart size (or half-gallon) fruit jar or crock, dissolve yeast with 1/4 cup water. Allow to stand several minutes then stir in water, flour, and sugar. Cover with a cloth. Leave overnight at room temperature. Stir down several times as mixture rises to top. The longer the mixture stands at room temperature, the stronger the sour taste. Replace cover and refrigerate until ready to use. To maintain an ample supply of starter, each time you use it, replenish it with equal amounts of warm water and flour. Makes about 2 cups.


SOURDOUGH PANCAKES

(This is the sourdough recipe that we usually use.)

Mix the night before using:

2 cups flour
2 cups milk
1 cup starter

Let stand overnight at room temperature.

When ready to cook, add:

2 eggs, beaten
1 teaspoon baking soda
1 teaspoon salt

Stir batter until well mixed. Grease griddle if necessary. Pour or spoon pancake batter onto hot griddle. When bubbly and puffed, turn and brown other side. Serve with your favorite syrup. Makes 16 pancakes.

For future use, add to starter:

1 cup water to original jar
1 cup flour
1 tablespoon sugar

Keep refrigerated.


SOUR DOUGH BISCUITS

Mix the night before using:

1 cup sourdough starter, at room temperature
1/2 cup warm water
1 cup flour

Let stand overnight at room temperature.

1 1/2 cups flour
2 teaspoons baking powder
1/2 teaspoon baking soda
1/2 teaspoon salt
1 Tablespoon sugar
Bacon drippings or butter or olive oil

About 1 hour before serving, turn dough out on 1 cup of the flour on a bread board. Combine remaining 1/2 cup flour with baking powder, soda, salt, and sugar. Knead flour lightly into batter. Make a well in the dough and mix dry ingredients into the batter, kneading lightly to get correct consistency for rolling dough without sticking. Roll to 1/2 inch thickness. Cut biscuits with a cutter or into 2" x 3" rectangles. Brush tops with warm bacon drippings or warm butter or olive oil. Place biscuits 1/2 inch apart on baking sheet, or close together in a 9-inch square pan, and set in a warm place to rise about 1/2 hour. Bake at 400 degrees about 20 minutes. Makes 14 biscuits.

Saturday, October 26, 2013

A Meal Made Of Childhood Memories

A while back our next-to-the-youngest son (nearly 30 now) requested that I make, and teach his wife how to make, one of his favorite childhood meals. It's been years since I've cooked like this, but, today, at his request, my daughter-in-law, along with two of the grandlittles, came over and we set to work. We made chicken chowder, refrigerator rolls, and a pumpkin roll. With fall in the air, I thought I might as well pass the recipes along to you, so you and your family can enjoy them as well! Have a blessed weekend!

~Rebecca


CHICKEN CHOWDER SOUP


2 chicken bouillon cubes
2 c. boiling water
3 c. diced potatoes
1 c. sliced carrots
1 c. sliced celery
1/2 c. chopped onion
2 c. shredded Cheddar cheese
1 1/2 tsp. salt
1/2 tsp. pepper
1/4 c. butter or margarine
2 c. milk
2 to 3 Tbsp. flour
2 c. cooked, cubed chicken or turkey
1 can corn, drained, if desired

Dissolve bouillon cubes in water; add seasonings and vegetables. Cover; simmer until tender. DO NOT DRAIN. In separate pan make white sauce with butter, flour and milk. Add cheese and stir until melted. Stir chicken into vegetable mixture. Add cheese sauce. Heat, but do not boil.

REFRIGERATOR ROLL DOUGH

1 package active dry yeast (or 2 1/2 teaspoons bulk)
1 1/2 cups warm water
1 cup unseasoned lukewarm mashed potatoes
2/3 cup sugar
2/3 cup shortening
2 eggs
1 1/2 teaspoons salt
6 to 7 cups all-purpose or unbleached flour

Dissolve yeast in warm water in large bowl. Stir in potatoes, sugar, shortening, eggs, salt and 3 cups of the flour. Beat until smooth. Mix in enough remaining flour to make dough easy to handle. Turn dough onto lightly floured surface; knead until smooth and elastic, about 5 minutes. Place in greased bowl; turn greased side up. Cover bowl tightly; refrigerate at least 8 hours but no longer than 5 days.

When you get ready to make the rolls, divide, and bake at 400 degrees until golden brown (about 15 minutes).


PUMPKIN ROLL

(Makes 10 servings)

CAKE:

Powdered sugar
3/4 cup flour
1/2 tsp. baking powder
1/2 tsp. baking soda
1/2 tsp. cinnamon
1/2 tsp. cloves
1/4 tsp. salt
3 large eggs
1 cup granulated sugar
2/3 cup canned pumpkin

FILLING:

1 pkg. (8 oz.) cream cheese, softened (I use 1/3 less fat cream cheese)
1 cup powdered sugar
6 Tbsp. butter, softened
1 tsp. vanilla
Powdered sugar

FOR CAKE: PREHEAT oven to 375 degrees F. Grease 15 x 10-inch jelly-roll pan; line with wax paper. Grease and flour paper. Sprinkle a thin, cotton kitchen towel (NOT THE FUZZY KIND) with powdered sugar.

COMBINE flour, baking powder, baking soda, cinnamon, cloves, and salt in small bowl. Beat eggs and sugar in large mixer bowl until thick. Beat in pumpkin. Stir in flour mixture. Spread evenly into prepared pan.

BAKE for 13-15 minutes or until top of cake springs back when touched. Immediately loosen and turn cake onto prepared towel. Carefully peel off paper. Roll up cake and towel together, starting with narrow end. Cool completely.

FOR FILLING: Beat cream cheese, powdered sugar, butter, and vanilla extract in a small mixer bowl until smooth. Carefully unroll cake; remove towel. Spread cream cheese mixture over cake. Re-roll cake. Wrap in plastic wrap and refrigerate at least one hour. Sprinkle with powdered sugar before serving, if desired.


Wednesday, October 16, 2013

Native American Recipes That Exemplify The Tastes Of Autumn

A few years ago our youngest son and I had been studying Missouri's Osage Indians in history. To end our study on a festive note, we invited a "neighboring tribe" (the next-door neighbors) over to share a feast with us. We served traditional Native American dishes, all of which were simple and delicious, and, combined, they exemplified the tastes of autumn. I have never shared these recipes here, so, since I'm making corn chowder for supper tonight, I thought I'd share them with you now.

OJIBWA BAKED PUMPKIN

1 small pumpkin
1/4 cup apple cider
1/4 cup maple syrup
1/4 cup melted butter

Place whole pumpkin in oven and bake at 350 degrees for 1 1/2 to 2 hours. Cut hole in top and scoop out the pulp and seeds. Set seeds aside for later eating. Mix together remaining ingredients and pour into pumpkin; bake for 35 minutes. Cut into wedges and serve.


CORN CHOWDER

1 medium onion, chopped
1 can creamed corn
1 can whole kernel corn, drained
1 cup diced potatoes, cooked until tender
2 1/2 cups milk
1/2 tsp. salt
pepper to taste

In a large saucepan brown onions, cooking over low heat. Add remaining ingredients and bring to a boil, then turn down the heat and simmer for a few minutes.

INDIAN FRY BREAD
3 cups flour
palm of baking powder
palm of salt
enough milk to make dough

Mix. Tear off small amounts of dough and flatten. Deep fry in hot oil until both sides are golden brown.
Enjoy!
~Rebecca