Showing posts with label homemade. Show all posts

Thursday, March 2, 2023

Recipe - Peanut Butter Cookies

I don't think I've made peanut butter cookies since the kids were little, but last night I got me a real hankerin' for some, so I made a batch and boy! Were they ever good! Thought I'd share the recipe with you here today! Enjoy! 


PEANUT BUTTER COOKIES

1/2 cup sugar
1/2 cup packed brown sugar
1/2 cup shortening (I used canola oil)
1/2 cup peanut butter
1 egg
1 1/4 cup flour (I used Prairie Gold whole wheat)
3/4 teaspoon baking soda
1/2 teaspoon baking powder
1/4 teaspoon salt

Mix ingredients together and chill dough for at least 3 hours. 

Heat oven to 375 degrees. Shape into 1 1/4-inch balls. Place 3 inches apart on an ungreased cookie sheet. Flatten in crisscross pattern with fork dipped in flour. Bake 10 to 12 minutes.

Cool slightly before removing from cookie sheet; cool completely. 

Makes about 3 dozen cookies.

Until next time...
~Rebecca

Recent and related posts that you might enjoy reading...

Note: The link to this recipe has been posted on the following sites, as well...


Tuesday, December 13, 2022

Candy Cane Wreath

Amanda made this beautiful candy cane wreath for me for Christmas.


I have no idea where she got the idea for it, but here's a link to one that I found on-line that has super-simple instructions:

Candy Cane Christmas Wreath - To get instructions, click HERE.


If you're looking for last minute gift ideas there's still plenty of time to make a few for family, friends, and neighbors.


Photos don't do it justice. Mine is absolutely beautiful!!!


Until next time...
~Rebecca 

Tuesday, October 26, 2021

Homemade Dryer Balls (Or Refurbishing the Ones That You Have)


The wool dryer balls that I purchased several years ago were in bad shape and no longer effective in cutting down on dryer time. 


My first instinct was to just throw them away and buy more, so I put them in the trash can that I keep near the dryer. I use it to put lint in that I clean from the dryer screen.

As I sat down at the computer to start looking for new dryer balls, and, with times being what they are, I wondered what instructions could be found online for making homemade dryer balls.

In exploring the possibilities I came across this site:
 

Instead of ordering new dryer balls I decided to make my own.

Instead of starting totally from scratch, I decided to retrieve and refurbish the dryer balls that I already had that were falling apart. 

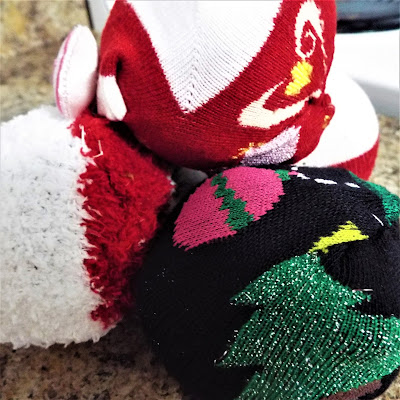
This was the end result...

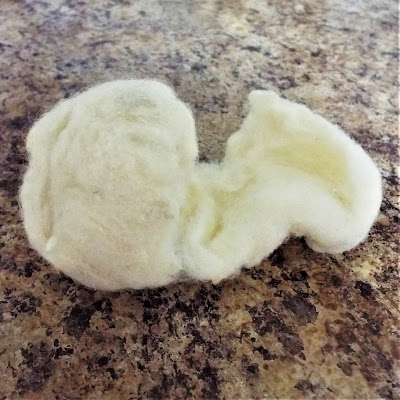
By inserting a falling-apart dryer ball inside of a first sock, then, twisting, and folding over, then inserting the whole thing inside of a second sock (turning inside-out, if necessary, to make them come out right), twisting, folding over, and whip-stitching the edge down, I got a whole new dryer ball and the old dryer ball just added extra weight, which should add to the savings even further.


I repeated the process with each of the other five dryer balls that I had retrieved from the trash and ended up with half a dozen newly refurbished dryer balls at no cost using items already on hand. 


That's a savings of $30.00 over dryer balls previously purchased and I'd say that's a win-win all the way around! 

Until next time...
~Rebecca

Recent and related posts that you might enjoy reading...


Monday, October 26, 2015

Homemade Natural Air Freshener

Ingredients For Making Your Own Natural Air Freshener

I love Fabreeze and have used several bottles of it over the years, but I do worry about the harmful effects of chemicals in products like this one, especially when using it on furniture and/or carpet where our skin touches it.

After reading an article about the dangers of Fabreeze this morning, I decided to try my hand at making my own natural air freshener and am quite pleased with the results. I decided to share the recipe here.

To make your own air freshener you will need:
  • 1 tbsp of baking soda
  • 2 cups of water
  • 10 drops of essential oil (I used lavender)
Mix the baking soda and essential oil in a bowl with a fork to keep the oil suspended in the water. Pour the mixture into a clean spray bottle and top off with the water. Shake before every use.

Blessing,
~Rebecca

Tuesday, November 4, 2014

Rustic Oat and Wheat Bread

Greetings, Dear Friends!

It's been forever since I've been with you. (At least it feels like it's been forever!)

Since going to work part-time, my life has been totally different and it's taken me a long, long time to adjust. I've been working since June and am just now working myself back into some normal-for-me-activities...like baking and blogging...neither of which I've not done for months, but both of which I am doing today.

It's autumn here in southwest Missouri and with the arrival of cool, damp weather my husband has had him a hankerin' for some good old-fashioned, homemade bread...specifically, his favorite, my Rustic Oat and Wheat Bread. He asked me last night if it might be possible to make a loaf or two for him soon. So, first this morning, I started baking and oh! How wonderful the house smells!

While I was at it I thought I might as well go ahead and share the recipe here. This is a great recipe for a hardy bread that is just made to go with wintertime soups and stews. If you end up trying it, I hope your family enjoys it as much as mine has over the years. It's simply delicious!

Until Next Time,
~Rebecca


RUSTIC OATS AND WHEAT BREAD

1 cup rolled wheat
1/4 firmly packed brown sugar
2 teaspoons salt
2 cups boiling water
1/4 cup molasses
3 tablespoons olive oil
2 packages active dry yeast
2/3 cup water heated to 105 to 115 degrees F.
4 3/4 to 5 3/4 cups unbleached flour
1 cup regular old-fashioned oats

Topping

1 egg, beaten
1 tablespoon old-fashioned oats

Spray two cookie sheets with cooking spray. In a large bowl, combine rolled wheat, brown sugar, salt, 2 cups boiling water molasses and oil; mix well. Cool to 105 to 115 degrees F. In small bowl, dissolve yeast in 2/3 cup water. Add to cooled rolled wheat mixture. Lightly spoon flour into measuring cup; level off. Add 2 cups flour to rolled wheat mixture. Blend at low speed until moistened; beat 2 minutes at medium speed. By hand, stir in 1 cup regular oats and 2 1/4 to 2 3/4 cups flour until dough pulls cleanly away from sides of bowl.

On floured surface, knead in 1/2 to 1 cup flour until dough is smooth and elastic, about 10 minutes. Place dough in greased bowl; cover loosely with greased plastic wrap and cloth towel. Let rise in warm place (80 to 85 degrees F.) until light and doubled in size, about 45 to 60 minutes.

Punch dough down several times to remove all air bubbles. Divide dough in half; shape into balls. Place on sprayed cookie sheets. With sharp knife, slash a 1/4 inch deep lattice design in top of each loaf. Cover; let rise in warm place until light and doubled in size, about 45 to 60 minutes.

Heat oven to 350 degrees F. Brush loaves with beaten egg; sprinkle with 1 tablespoon regular oats. Bake at 350 degrees for 35 to 45 minutes or until deep golden brown and loaves sound hollow when lightly tapped. Remove from cookie sheets; cool on wire racks. Makes 2 (16 slice) loaves.

Tuesday, July 16, 2013

Fresh Garlic For The Ear


I had been battling a painful, swollen, stuffy ear for several days and it wasn't getting any better. In fact, it was getting worse. It felt like I had a super ball stuck in my ear and I could barely hear out of it. I was living on pain relievers and Benadryl until I thought, "You know what? I'm just gonna try garlic!" I had heard of it from multiple sources before, but would never have believed it unless I tried it myself...which I did...and it does! A clove of garlic in the ear really works to draw infection and the pain is gone! And relief came in an amazingly short time!
What I did was remove a clove of garlic from the head, peel it, snip the pointy end off making it flat, and cut a few small slits in the end of it to release the oils. Then I stuck the whole clove down into the ear canal and immediately the oils began to sooth the pain. Within a short time afterwards the hard ball of infection behind my ear began to grow smaller and the pain was gone. I still have a very small knot behind my ear, but the pain and swelling have not returned. I am doing a second clove in the ear canal now and expect that it will finish the job that the first one started. I am totally and completely amazed!

Tuesday, June 25, 2013

Homemade Noodles And A New Daughter-in-Love

My husband makes egg white omelets quite often, and this morning he had told me that there were enough egg yolks to make a double batch of noodles if I wanted them. Of course I wanted them! :)

 Our youngest son and his wife...our new daughter-in-love, Crissy...came over after he got off work this morning, and she was delighted to get in on the noodle-making process. Here are a few pictures of her doing so...


Crissy Making Her First Batch Of Noodles

Rolling Them Out
"Happiness in noodle form!" ~ Crissy Knox
Our Finished Product -Beautiful! :)

Here's my recipe for homemade noodles...

NOODLES

2 cups flour
3 egg yolks
1 egg
2 tsp. salt
1/4 to 1/2 cup water

Make a well in the center of flour. Add egg yolks, egg, and salt; mix well. Mix in water 1 tablespoon at a time. Roll thin rectangle  of dough around rolling pin or fold loosely into thirds and cut. (I use a hand-held noodle cutter.) Cook noodles until tender. Drain quickly, but thoroughly in colander.

We are using our noodles today in chicken and noodles. :)

Have a blessed day!
~Rebecca

Sunday, April 22, 2012

Homemade Kansas City Style Barbeque Sauce

I found (and made) this recipe for Kansas City Style Barbeque Sauce and it is THE best!!! From now on I will be making my own!


HOMEMADE KANSAS CITY STYLE BARBECUE SAUCE

1 1/3 cup tomato sauce
1/3 cup tomato paste
1/3 cup honey
1/2 cup + 3 tbsp red wine vinegar
1/4 cup molasses (unsulfered)
2 tsp all natural hickory or mesquite liquid smoke (Colgin)
1/2 tsp cayenne pepper
1/2 tsp salt
1/2 tsp black pepper
1/2 tsp paprika
1/4 tsp garlic powder
1/4 tsp onion powder
1/8 tsp ground cinnamon
1/8 tsp chili powder

In a large saucepan combine all the ingredients and simmer over low heat for 25 minutes stirring occassionally. Let cool and store in the fridge until ready to use. Makes 2 cups + 2 tbsp.

Monday, November 21, 2011

Good MONDAY Morning - 11/21/11 - Failed Yogurt Experience and Weight-loss Update

Good Morning, Dear Ladies! It's Monday! (I know some people hate Mondays, but I love them!)

I was up early this morning. Had the cats fed, the dog out, and the chickens fed, watered, and out just after daybreak. Since then I've been baking. Have made two pumpkin pies for tomorrow (an early Thanksgiving with my dad and a friend), a dozen muffins to freeze, and cornbread is baking in the oven now for lunch today.

Over the weekend I had a failed yogurt experience. I used my usual homemade yogurt recipe (and if anyone want to try it, please, read both of these articles before starting - Homemade Yogurt and Perfecting The Process) except, due to the fact that I haven't made yogurt in a while, I was out of homemade starter, so, this time, I tried a less expensive yogurt to use as my starter. I used Dannon-brand, plain, Greek yogurt instead of Oikos-brand, plain, Greek yogurt like I normally do. It didn't work!

When I got up Saturday morning, instead of having a crockpot full of nice, thick, homemade yogurt, I had slightly thickened yogurt-milk! Oh,no! I didn't want to waste it, so I went ahead and bottled it up into two quart jars. I've been using the yogurt-milk instead of regular milk in my baking...namely in the muffins and cornbread. It worked great! No flavor difference really...just a moister, creamier texture...quite good, in fact! Anyway, I wanted to share that with you all and tell you, if you try the homemade yogurt, please, be sure and use Oikos-brand, plain, Greek, yogurt as your starter...not something cheaper.

I've had several people ask me how the weight-loss is coming along. Well, when I first shared about my struggles with the weight-loss back in June of 2011 I was weighing in at 257 pounds (that was down 29 pounds from an all-time high of 286 pounds). At last check-in here (August of 2011) I was 8/10 of a pound away from reaching my next goal of 247 pounds. I have surpassed that one, met another, and am currently 2/10 of pound away from reaching my current goal of 225 pounds. When I hit 218 I will be halfway to the final goal from where my journey began. At my starting point I need to lose a total of 136 pounds; at present I am 76 pounds away from reaching that final goal.

 Well, my kitchen timer is going off and the cornbread is about ready to come of the oven, so I am going to close for now. I wish you all a wonderful Monday and a Happy Thanksgiving week! God bless all here!

All My Love,
~Rebecca

Thursday, July 14, 2011

RECIPE: Margarita Pizza With Mozzarella-Stuffed Crust

Margarita Pizza With Mozzarella-Stuffed Crust

Summer really hasn't started for us until we've had the first slice of Margarita pizza (named after Queen Margarita of Spain). This year I tried something new by making it with a mozzarella-stuffed crust. 

A Margarita pizza is really easy to make. Simply make your crust (see recipe below), sprinkle generously with garlic powder and dried basil, then top with fresh sliced tomatoes, fresh basil leaves, and slices of provolone cheese. 

To make the mozzarella-stuffed crust, just take two cheese sticks and tear into quarters and roll up in the edges of the crust. 

Bake pizza at 450 degrees until crust is done and cheese is bubbly (about 15 mintues) and enjoy!

Pizza Crust
 
2 1/2 teaspoons or 1 package yeast
1 cup warm water
1 teaspoon sugar
1 teaspoon salt
2 tablespoons olive oil
2 1/2 cups unbleached or whole wheat flour

Mix well. Then flatten out in pizza pan that has been drizzled with olive oil. Brush top of crust with olive oil.

Saturday, June 25, 2011

Perfecting The Yogurt Making Process - Making Greek Yogurt

The Whey And Greek Yogurt

Back in March I shared the recipe that I have been using to make my own homemade yogurt. Other than when there was a lapse in time and I needed a new container of Oikos Greek Yogurt for fresh starter, I've not bought a container of store-bought yogurt since then.

Sometimes when I would make the yogurt it would turn out perfectly smooth and creamy. At other times it would turn out kind of grainy and very runny. I have no idea what made the difference. But the other day I was reading somewhere that to make Greek yogurt, you simply have to strain the whey (the liquid) off of the homemade yogurt, so I tried it and, boy! Am I ever happy with the results!

All I did was, overnight I made my regular recipe of homemade yogurt. This morning I lined a large colander with a clean, cotton towel (a smooth one...not a fuzzy one), and I set it atop a large bowl. I dumped the contents of the crockpot that the yogurt was in into the towel, covered it, and let it drain. As you can see above, after straining the liquid off, all that was left was the very thick, awesomely good, Greek-style yogurt that can be eaten alone, used as sour cream, served with fruit, or used to cook with in a multitude of recipes. 

I saved the whey as well. It is full of nutrients and, if you prefer a little creamier yogurt, you can always stir a little back into the yogurt, or you can add it into smoothies, etc.


Question: If you've ever made your own homemade yogurt, what did you do with the whey?


(This post was featured in The Legacy of Home's 'The Christian Home' - Issue 21 - June 27, 2011. Please visit Mrs. White's site by clicking HERE.)

Wednesday, June 8, 2011

Create Your Own 'Nutmeg Notes Kitchen Scrapbook' by Sandy Willoughby

Every once in awhile a post comes along that really sticks in my head...something that I've read that others have written about that sparks an idea of something that I would like to try or incorporate into my own life...something I want to learn how to do...or, in this case, something I want to make one day. 

This is a post that was first posted by my friend, Sandy, several years ago on her Nutmeg Notes site. Creating a 'Nutmeg Notes Kitchen Scrapbook' is something that I would someday like to create for myself, as well as one for each of my daughters and daughters-in-law.

I hope you enjoy reading Sandy's post as much as I did...


Dear Creative Ones by God's grace and gifts,

Have you ever been in awe over what goes on in a kitchen and/or dining room? There are so many things that transform from one fairly plain and simple "something" to a dish that feeds a family, a soup that soothes a weary soul, or a beverage that comforts with the warmth it gives.

Over the years, the Lord has just given me... as I've heard the same of with others...recipe after recipe thrown together that became instant favorites. He has shown me grand meals from a needy pantry, given me grace to offer a chair to a tired friend, relative, and stranger, and provided what I've needed to serve not only beverages and meals but hospitality and hope.

In an effort to preserve some of these recipes, sentimental moments, ideas, and creative gifts from God over the years, I have started many little kitchen notebooks. There have been notes jotted in spiral notebooks, papers punched and placed in three ring binders, folders filled until they became so stuffed I couldn't keep up with them, and more.

I finally think I know the best way to preserve these! I can make a Nutmeg Notes Scrapbook! I had already decided to change my Home Notes Journal into a scrap book and realized that one specifically for the kitchen and dining would be a great addition:)

It has dawned on me that not only would these books be a wonderful way to hand our family blessings down the line and for enjoyment by us as the years go by... but this might serve many a need in the long run. When someone asked: "Whatever happened to that recipe for.... ?" maybe it will be in one of those pages! If we are trying to remember the circumstances around a time God sent someone to our table over coffee that served like an angel... maybe they'll have been journaled right in our little (or huge) book!

(To finish reading Sandy's article, please, click HERE....)

Friday, May 20, 2011

Making Sauerkraut From A Vintage Family Recipe

"...And this is the finest Kraut I ever did eat. I am thinking of getting my self some cabbage and make some when we go to town make it this way and you wont regret it..." 
                                                      ~my great-aunt, Jessie McCann Martin

Grandma Maude's Handmade Binder

Among the many things that keep me connected to my grandmother (my dad's mother), Maude Belle McCann Brown Graham, is this treasured binder that she made in December of 1941 to house her, then new, Ball Blue Book, as well as other favorite family recipes in, among which is her sister, Jessie's, handwritten sauerkraut recipe. It's not only the recipe that my grandmother and Aunt Jessie used, but it's the recipe that my mother used, and the recipe that I have used since first learning how to can.

Dec. 1941 - Maude B. Graham - Birch Tree, MO

Grandma's 1941 Ball Blue Book

Yesterday we were blessed with three large heads of cabbage.

These were some of the biggest cabbages I've
ever seen and I think they were home grown!

They were too big to fit in our fridge, so this morning I set to work turning them into sauerkraut. Once again, I used Aunt Jessie's tried and true recipe.

Great-aunt Jessie's Handwritten 'Sour Kraut' Recipe

 Aunt Jessie's recipe reads as follows (and I quoted it word for word exactly the way Aunt Jessie wrote it)...

"...here is how I make my sour kraut I cut It with a cutter and then pack it tight In the Jars I use the handle of a butcher Knife and press it tight and dont leave no air holes In it and then I put a tea spoon salt to a qt or a table spoon  to a half gallon. and have a tea kettle hot boiling water and fill the Jar with hot boiling water and seal tight. and set the jars in a pan for they will spit out some. And this is the finest Kraut I ever did eat. I am thinking of getting my self some cabbage and make some when we go to town make it this way and you wont regret it..."

Using photos and a few further instructions of my own, I have decided to share Aunt Jessie's recipe here on HEARTH AND HOME...

After preparing the quart jars and tearing away the outer leaves of the cabbages (which were a real treat for our chickens), I set to work cutting one cabbage at a time into quarters, coring it, and slicing the quarters into food-processor-sized slices. 

Old glass mayonnaise jars work great for sauerkraut!

Slicing The Quarters

Preparing The Cabbage For Kraut

Alternately, I worked between slicing cabbage, running it through the food-processor, filling a big bowl with shredded cabbage, and packing it into clean jars.

The food-processor did a great job
of shredding the cabbage for kraut!

Shredded cabbage was everywhere!

Packing The Kraut Into Jars

You want it good and tight!

A wooden spoon helps to tamp it down.

Next, it was time to add salt...1 teaspoon per quart and boiling water to each jar. I'm not sure what kind of salt Aunt Jessie used, but I used regular Morton Canning and Pickling Salt.

Adding salt to each quart...

...and boiling water.

After that, the next step was to release the air bubbles. I did this by just running a regular table knife up and down the inside edge of each jar from top to bottom several times. After that I finished filling the jars to within a half-inch of the top with more boiling water.

Releasing The Air Bubbles

Adding More Hot Water To Fill

Then it was time to clean the rims of the jars and cap them with lids which had been kept on the stove in boiling hot water.

Cleaning The Rims Of The Jars

Capping The Jars

The final step in the canning process...at least this leg of it...was to rinse the jars and line up them up on the cabinet to admire their beauty.

Rinsing The Jars

The Finished Product (For Now Anyway)

I got eight, fully-packed quarts of sauerkraut out of the three heads of cabbage. While I was preparing the kraut, my husband was preparing a a cool, dry place under our house to store the kraut while it ferments. That is where it will stay for the next six weeks. After that we will bring it out, wipe the jars, refill any jars that are low on water, recap with fresh caps, and bathe them in a hot water bath for 30 minutes. After that, the sauerkraut will be ready to eat.

(This article is linked back to The Legacy of Home's 'Vintage Home Link-Up' page. Please visit it to find other great articles on 'vintage living'.)

Friday, May 6, 2011

Attempting Something New - Taco Pizza

Taco Pizza

After coming home from a walk around town delivering eggs and running errands, my son and I were really hungry! Tony said that he'd like to have a taco pizza for lunch, but not the store-bought kind because of fat and calories...but something homemade...could I do that? I said that surely I could come up with something and I set to work. To my surprise and pleasure the making of a taco pizza also aided me in using up some of the things that I had on my list to use up as soon as possible out of the fridge (leftover salsa, salad, and cheese).

I made my regular pizza crust and topped it with the following:

2 cans black beans mashed and seasoned to taste with onion powder, cumin, and chili powder
2 cups salsa
1 can chopped green chilis
2 cups mozzarella cheese

After the pizza finished baking (450 degrees for approximately 20 minutes) I topped it with leftover salad, a sprinkling of fat-free cheddar cheese, and a handful or two of crushed tortilla chip.

The general consensus? Absolutely awesome!!!

Wednesday, May 4, 2011

Recipes: ENCHILADA SAUCE and ENCHILADA CASSEROLE


As often ends up being the case I started off with a couple of recipes, tweaked them to use up what I had on hand instead of what they called for, and made them my own variation. Both turned out really good...very spicy...full of Mexican flavor!

ENCHILADA SAUCE

(This will be used in the following recipe.)

1/4 canola oil
2 tablespoons flour
1/4 cup chili powder
1 (8 oz.) can tomato sauce
1 1/2 cups water
1/4 teaspoon ground cumin
1/4 teaspoon garlic powder
1/4 teaspoon onion powder
salt to taste

Heat oil in skillet over medium-high heat. Stir in flour and chili powder; reduce heat to medium, and cook until lightly browned, stirring constantly to prevent burning; reduce heat. Mix the tomato sauce, water, cumin, garlic powder, onion powder, and salt, and gradually add to the chili powder, flour, and oil mixture. Continue cooking and stirring over medium heat until sauce begins to bubble and is slightly thickened.

ENCHILADA CASSEROLE


1 cup onion, chopped
2 tablespoon olive oil
1 lb. Jenni-O's ground turkey, crumbled and browned

16 oz. black beans, rinsed and drained
2 cans Rotel tomatoes
corn cut from 3 large cobs of corn or 1 (11 oz.) can Mexican style corn, drained
1 teaspoon chili powder
1 teaspoon ground cumin
1 recipe of enchilada sauce above or 2 (10 oz.) cans enchilada sauce
6 (6-inch) low-carb, wheat tortillas
3 cups shredded, fat-free cheddar cheese

Saute onion in hot oil in skillet until tender. Add the cooked, browned turkey, black beans, Rotel tomatoes, corn, chili powder, and cumin. Stir and heat through. Tear tortillas in half. Spoon 1/3 of the enchilada sauce into bottom of a 9x13-inch dish that has been sprayed with pan spray. Layer half of the tortilla halves on the bottom, half of the meat, bean, corn, and tomato mixture, and one cup of the cheese. Repeat. Top with remaining sauce and cheese. Bake at 350 degrees for 20 to 30 minutes until golden and bubbly.

Monday, March 21, 2011