Showing posts with label do-it-yourself. Show all posts

Thursday, February 17, 2022

Getting Ready For Gardening Season

We may be in the middle of another winter storm outdoors, but, indoors, I'm getting ready for garden season!

Yesterday I made inquiries into getting a garden spot tilled up as soon as possible; today I'm starting seed in my Jiffy Seed Starting Greenhouse. 


I planted tomatoes (Roma), bell peppers (Sweet Cal Wonder), squash (Early Golden Summer Crookneck, Black Beauty Zucchini,  Burpee's Butterbush Butternut, White Scallop), and pumpkin (New England Sugar Pie).


I can't wait to see those first tiny green sprouts popping up through the dirt!

What about you? Are you looking forward to gardening season? What gardening dreams are you dreaming right now?

Until next time...
~Rebecca

Recent and related posts that you might enjoy reading...

Tuesday, November 2, 2021

Dry Beans - Useful Hints and Tips and A Basic Dry Bean Mix

I've always liked beans and have several go-to recipes when I'm in the mood for them, but, for the purpose of economy, I plan to incorporate them a lot more in the days ahead. 


Below is a list of useful hints and tips when it comes to cooking with dry beans and a recipe for a Basic Dry Bean Mix.

- 1 cup of dried beans yields 2 1/2 cups cooked beans.

- Cooked beans and bean dishes freeze well and can be made ahead of time at your convenience.

- Cover beans with water to which 1 tablespoon of baking soda or salt has been added; soak overnight. This seems to eliminate some of the gas that beans tend to create in our systems. Soaking the beans also helps tenderize them. Pour off soaking water and rinse beans before adding the cooking water, unless otherwise stated in the recipe. 

- If you don't have time, or forget to soak the beans overnight, a quick way to tenderize them is to cover them with water to which 1 tablespoon of salt ha been added, bring to a boil and simmer for 1 to 2 hours before using them in a recipe.

- Most bean dishes may be cooked longer than stated in the recipe. 

- Reheating bean dishes enhances the flavor.

- Store beans in a cool, dry place in a tightly covered container to keep them from becoming too dry and hard. 

- Cooking time will vary depending upon the type and age of the bean being used and the hardness of the water.

- A small amount of butter or oil added to the beans during cooking time will keep down foam.

- Acids, such as tomatoes, should be added after the beans have cooked and are rather soft.

- If you are not used to eating a diet high in beans take it low and easy. Increase your intake a little at a time to help your intestinal tract adjust. Otherwise, you may experience the discomfort of bloating and gas. 


BASIC DRY BEAN MIX

I plan on using this bean mix a lot this winter and will be referring back to this post when sharing recipes that use them.


1/3 cup of each bean = 4 cups already mixed

- Black beans
- Navy beans
- Red kidney beans
- Baby lima beans
- Pinto beans
- Lentils
- Pearl barley
- Black-eyed peas
- Split peas, both green and yellow

The original recipe also called for soy beans, chick peas, and whole green peas, none of which I had on hand, so I just added extra beans of the ones I had the most of in the list above.

Buy packages of these beans, usually in the smaller bags, and just mix them altogether, storing them in a large container. Don't bother measuring each type of bean for the mix. The packages are of different ounce sizes, so just open them up and mix. This gives a different variety and is always good and always ready to use.

If you prefer, already mixed beans may be purchased in many grocery and bulk food stores, as well.  

Until next time...
~Rebecca

Recent and related posts that you might enjoy reading...


NEW!!! Rebecca's HEARTH AND HOME Beta Android Application Version 1.0.14 (still under development - follow online instructions)


Tuesday, October 26, 2021

Homemade Dryer Balls (Or Refurbishing the Ones That You Have)


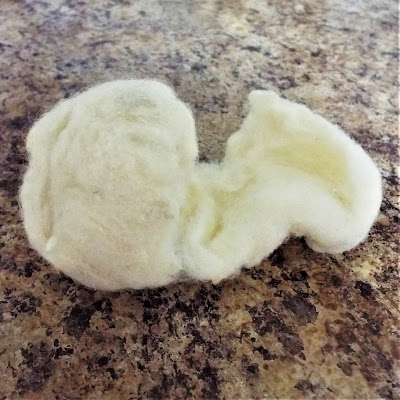
The wool dryer balls that I purchased several years ago were in bad shape and no longer effective in cutting down on dryer time. 


My first instinct was to just throw them away and buy more, so I put them in the trash can that I keep near the dryer. I use it to put lint in that I clean from the dryer screen.

As I sat down at the computer to start looking for new dryer balls, and, with times being what they are, I wondered what instructions could be found online for making homemade dryer balls.

In exploring the possibilities I came across this site:
 

Instead of ordering new dryer balls I decided to make my own.

Instead of starting totally from scratch, I decided to retrieve and refurbish the dryer balls that I already had that were falling apart. 

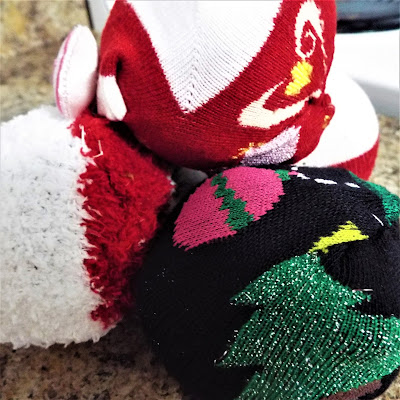
This was the end result...

By inserting a falling-apart dryer ball inside of a first sock, then, twisting, and folding over, then inserting the whole thing inside of a second sock (turning inside-out, if necessary, to make them come out right), twisting, folding over, and whip-stitching the edge down, I got a whole new dryer ball and the old dryer ball just added extra weight, which should add to the savings even further.


I repeated the process with each of the other five dryer balls that I had retrieved from the trash and ended up with half a dozen newly refurbished dryer balls at no cost using items already on hand. 


That's a savings of $30.00 over dryer balls previously purchased and I'd say that's a win-win all the way around! 

Until next time...
~Rebecca

Recent and related posts that you might enjoy reading...


Friday, August 20, 2021

Recipes For Sourdough Starter, Pancakes, and Biscuits and Link To a Beginner's Sourdough Bread Recipe

It's been a while since I've made any sourdough starter, but due to a renewed interest in my own health and healing, I determined, this morning, to find a half-gallon jar and get some starter going.


I've shared these recipes before, but it's been a while, so I've decided to share them again. 

What about you? Have you tried your hand at sourdough before? If so, what's been your experience? Do you have any recipes to share?

Here are the recipes that I have to share and, since I can't find my mother's recipe for sourdough bread, I will share a link to the Beginner's Sourdough Bread Recipe that I am going to try next. You can get to that recipe by clicking HERE.

NOTE: You can use the following starter for the 2 teaspoons of sourdough starter called for to make the 1/4 cup of Active Sourdough Starter in the recipe mentioned above at Little Spoon Farm.


Should you choose to do so, have fun experimenting with, cooking, and baking with sourdough! 

SOURDOUGH STARTER

1 package active dry yeast
1/4 cup lukewarm water (potato water is good)
2 cups warm water
1 1/2 cups flour
1 tablespoon sugar

Using a quart size (or half-gallon) mason jar or crock, dissolve yeast with 1/4 cup water. Allow to stand several minutes then stir in water, flour, and sugar. Cover with a cloth. Leave overnight at room temperature. Stir down several times as mixture rises to top. The longer the mixture stands at room temperature, the stronger the sour taste. Replace cover and refrigerate until ready to use. To maintain an ample supply of starter, each time you use it, replenish it with equal amounts of warm water and flour. Makes about 2 cups.


SOURDOUGH PANCAKES

(This is the sourdough recipe that we usually use.)

Mix the night before using:

2 cups flour
2 cups milk
1 cup starter

Let stand overnight at room temperature.

When ready to cook, add:

2 eggs, beaten
1 teaspoon baking soda
1 teaspoon salt

Stir batter until well mixed. Grease griddle if necessary. Pour or spoon pancake batter onto hot griddle. When bubbly and puffed, turn and brown other side. Serve with your favorite syrup. Makes 16 pancakes.

For future use, add to starter:

1 cup water to original jar
1 cup flour
1 tablespoon sugar

Keep refrigerated.


SOUR DOUGH BISCUITS

Mix the night before using:

1 cup sourdough starter, at room temperature
1/2 cup warm water
1 cup flour

Let stand overnight at room temperature.

1 1/2 cups flour
2 teaspoons baking powder
1/2 teaspoon baking soda
1/2 teaspoon salt
1 Tablespoon sugar
Bacon drippings or butter or olive oil

About 1 hour before serving, turn dough out on 1 cup of the flour on a bread board. Combine remaining 1/2 cup flour with baking powder, soda, salt, and sugar. Knead flour lightly into batter. Make a well in the dough and mix dry ingredients into the batter, kneading lightly to get correct consistency for rolling dough without sticking. Roll to 1/2 inch thickness. Cut biscuits with a cutter or into 2" x 3" rectangles. Brush tops with warm bacon drippings or warm butter or olive oil. Place biscuits 1/2 inch apart on baking sheet, or close together in a 9-inch square pan, and set in a warm place to rise about 1/2 hour. Bake at 400 degrees about 20 minutes. Makes 14 biscuits.

Until next time...

~Rebecca

P.S. - After posting this post I found my original Sourdough Bread recipe. You can get to it by clicking HERE

Recent and related posts that you might enjoy reading...

Wisdom Wednesday - August 18 - Proverbs 18


Thursday, March 26, 2020

DIY Disinfecting Wipes

I recently tried my hand at making my own disinfecting wipes and I am very pleased with how well they work. I've been using them to clean doorknobs, light switches, cabinet handles, and more.


DIY Disinfecting Wipes

DIY DISINFECTING WIPES

2 cups water
1 cup alcohol 70 to 91% (I used 91%)
1 tablespoon Dawn dish soap
3 drops tea tree oil, optional (I opted to include)
1 roll Bounty paper towels

Cut paper towel roll in half through the middle with a serrated knife. Put the towels, cut side down, into the container that you are going to keep them in. Mix together the water, alcohol, Dawn dish soap, and tea tree oil. Pour around the edges of the paper towel roll and let soak for a couple of minutes. Then, removed the paper towel roll and discard. Now you can pull wipes from the middle. Store in a closed container with lid.

Because I used a Bounty double-roll I didn't have a container big enough to fit so I just double-bagged in heavy-duty freezer bags. So far, that seems to be working.

Until next time...
~Rebecca

Recent and related posts that you might enjoy reading...

An Abundance of Onions

Momma's Easy No Yeast Dinner Rolls


Wednesday, December 5, 2018

Blogmas 2018 - Day 5 - For the Love of Peppermint


Fresh Peppermint From Our Garden
Growing up I wasn't a great fan of peppermint. My dad loved peppermint tea, but, as a child, I didn't even care for candy canes! 😲 All that's changed, now, though. Today, I love peppermint!


I like having peppermint candy around at Christmastime to share with visitors and to have with hot cocoa. One year I dipped the bowl-end of plastic spoons in melted chocolate, sprinkled them with crushed up candy canes, and laid them on wax paper to harden. After the chocolate solidified, I, individually, wrapped each spoon in clear cellophane paper, and tied tightly with a pretty ribbon around the spoon's neck. These were given as gifts in hot cocoa mugs, along with individual packages of hot cocoa mix. York Peppermint Patty is my favorite candy bar. I love the cool, minty freshness of it!

I think my love of peppermint started when my husband introduced me to the "original", "celebrated", and "curiously strong" peppermint-flavored Altoids. They are made with real peppermint oil and they are STOUT! At first they burned my mouth, but, eventually, they grew on me. Now, I actually enjoy having one on occasion (especially if I've got gas on my stomach...the peppermint releases it).
I find that the older I get the more I appreciate, not only the taste of peppermint, but the clean and refreshing aroma of it, as well.


Mrs. Meyer's Clean Day Multi-Surface Cleaner, Hand Soap, and Dish Soap
In fact, as if I wasn't already totally and completely crazy about Mrs. Meyer's Clean Day cleaning products (and I'm not an affiliate, so I don't get paid to say that), but I had to place an order for her limited edition, aroma-therapeutic, special seasonal scented products in peppermint just to try them out...and I'm so glad I did! What a joy it is to clean my home with them and everything smells soooo good! Thanks, Mrs. Meyers! I really do love and appreciate you! 💗

A gift idea...


How about trying your hand at making some peppermint-scented play dough for the children on your Christmas gift list? I found this great do-it-yourself recipe on Becky Mansfield's Your Modern Family website! Check it out!


A simple craft idea...


Use candy canes as dinner place card holders.


Yes, for not caring about peppermint as a child, I've sure come a long way! 

How about you? Do you like peppermint? If so, what's your favorite way to enjoy the flavor (or smell) of it?

Until next time,
~Rebecca


*Joining in with Jean over at So Not Organized and linking up with Tamy over at Chasing My Life for Blogmas 2018

Recent and related posts that you might enjoy reading...


Blogmas 2018 - Day 4 - Favorite Christmas Movies


Monday, December 3, 2018

Blogmas 2018 - Day 3 - Orange and Clove Pomanders

When I was a child, my mother and I used to enjoy doing old-fashioned crafts together. One of the things that we enjoyed doing most around Christmastime was making orange and clove pomanders. They were quick and easy to make and they smelled soooo good! 


As an adult, I had forgotten about these quaint and fragrant old-time decorations. That is, until I was reintroduced to them by my youngest daughter at her place of employment back in 2016. 

It was the first year that I had gone up to help with Christmas on the Farm at Watkins Woolen Mill State Park and Historic Site. Upon entering the dining-room, I discovered a few of these old-fashioned gems nestled among a whole host of beautiful and luscious fruit that graced the Watkins' holiday table. I was delighted! 


The Watkins Table - Christmas on the Farm - 2016
This year I decided to make a few orange and clove pomanders of my own and display them, accompanied by a few apples, in a fruit bowl on the kitchen table. 


There are many methods of making orange and clove pomanders (to learn more just Google "orange and clove pomanders" - there is a whole world of information out there about them), but, to make the ones here, I purchased a container of whole cloves and a bag of fresh oranges. Then, I simply pierced the oranges with the pointed ends of the cloves and embedded them into the fruit.


Mine aren't fancy at all, but they were fun to make and they smell great! Right now I am experimenting with drying some of the pomanders. I'll let you know how that turns out whenever I can. 😉

Until next time...
~Rebecca

*Joining in with Jean over at So Not Organized and linking up with Tamy over at Chasing My Life for Blogmas 2018

Recent and related posts that you might enjoy reading...


Happy Homemaker Monday - December 3, 2018


Thursday, May 3, 2018

Violets, Violet Jelly, and More

Common Violets - Photo Credit
In early spring violets grows in abundance here in southwest Missouri and our backyard is full of them! 

Cyndi's Candied Violets
A friend of mine, Cyndi Cogbill, of Pawpaw Patch Productions, inspired me this year when she tried her hand at making violet syrup and shared pictures of the candied violets she made and the sugar cookies that she featured them on. Wow! Absolutely beautiful! 

Cyndi's Sugar Cookies Featuring Candied Violets
Cyndi also shared the link to a great article on the virtues of violets from Eat The Weeds and Other Things, Too and that is where I got the original recipe for violet jelly, which I will be sharing my slightly tweaked version of in this post.

Like I said, in early spring our backyard is full of violets! After looking at Cyndi's pictures and reading the article that she posted the link for, I decided to gather my supplies and try my hand at making violet jelly...and I'm so glad I did! Not only is it beautiful, but it tastes delicious! It's sure to be an annual treat in this household from now on! 

The first thing I did, was to gather two cups of violet heads (no stems...no leaves...just heads) and put them in a jar.
Two Cups of Loosely-Packed Violet Heads
 Next, I made an infusion by pouring two cups of boiling water over the violet heads, covering them with a lid, and letting them sit for several hours.

An Infusion of Violets and Water
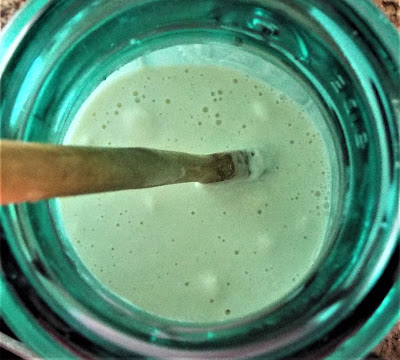
Immediately after covering the violets, the water started turning a pretty shade of turquoise blue. 
An Infusion of Violets and Water

The longer the violets sat, the darker the color became. I don't have a picture of it, but the water eventually turned an almost dark blue.

After sitting for several hours, I used a coffee filter inside a strainer to strain the flower heads from the infusion. Then, I squeezed the juice from one whole lemon and added it to the liquid.


Upon adding the juice from the lemon, a chemical reaction took place and the liquid in the jar turned a beautiful shade of pink.

After that, using the liquid in the jar, and following the instructions below, I went ahead and made the jelly. One recipe yielded five half-pint jars.

Violet Jelly

VIOLET JELLY

2 cups fresh violets
2 cups boiling water
Juice of one lemon
1 package of pectin (I used Sure-Jell)
4 cups sugar

Place the violet blossoms in a glass jar and cover them with the boiling water. Place a lid on the jar and allow infusion to make for anywhere between 2 and 24 hours (I let mine make for about six hours). The water will turn various shades of blue as times goes on. Strain and discard the spent flowers. Add the lemon juice. Mix will change to a pretty pink. Place liquid in a large stainless steel pan, stir in pectin, and bring to a boil. Add the sugar all at once and bring to a boil again. Boil vigorously for one minute. Skim if necessary. Pour into sterile jars and seal. (I hot-water bathed mine for 15 minutes in a hot-water bather.) Makes approximately 2 1/2 cups jelly.  

That's all there really was to it. The process was simple and the reward sweet. 

Be sure to click on the links throughout this article to learn more about violets and different ways of using them.

Until next time...

~Rebecca

Recent and related posts that you might enjoy reading...

Revisiting Mesothelioma Survivor Heather Von St. James


Recipe For Cherry Jelly