Showing posts with label food preservation. Show all posts

Wednesday, September 25, 2024

Recipe: Beef and Celery Stirfry

I had my menu plans made for the week when I discovered a bunch of celery wilting and on it's way out in the fridge. In order to use it up quickly I made a beef and celery stirfry today, and it was delicious!


Here's the recipe...

BEEF AND CELERY STIRFRY

 - 1 lb lean stew meat
 - 1 1/2 tbsp Bragg's aminos (or soy sauce)
 - 1/4 tsp salt
 - 1/4 tsp black pepper
 - 1 tsp ground ginger
 - 2 tsp corn starch
 - 1 1/2 tbsp sesame oil
 - 1 beef bullion cube dissolved in 1/2 cup        water
 - pinch of Super Sweet (or 1/4 tsp sugar)
 - 1/4 chopped onion
 - 2 cloves garlic
 - one bunch celery cleaned and cut into       half-inch slices

I slow-cooked the meat first to ensure tenderness. After draining most of the liquid, I added the rest of the ingredients, turned up the heat, and stir-fried until the celery was tender. I did add a little extra water a couple of times during cooking. Serve over rice or cauli-rice.

Until next time,
~Rebecca

Recent and related posts that you might enjoy reading...


Thursday, August 20, 2020

Avocado Blessings

Our daughter and her family were blessed with a large amount of produce yesterday. She passed on two nice cantaloupes and two 5-count bags of large avocados to us. 

The cantaloupes needed to ripen a few more days, but the avocados were at peak and needed to be used. How was I going to use up ten large avocados in a hurry?

In talking with Amber about them a little while ago, I discovered that she had frozen her avocados in halves. I didn't realize that avocados could be frozen! Wow! 😲

After talking with her, and doing a little further research on the California Avocado site, I decided to turn our avocados into guacamole and freeze it that way.

I saved back two avocados to be eaten fresh. We love them in salads, made into deviled egg filling, baked in the oven with bacon and eggs (see recipe below), and a variety of other ways. 


The remaining eight avocados I turned into guacamole (avocados peeled, pitted, and mashed mixed with lemon juice, garlic powder, onion powder, and salt to taste).


Then I divided it into half-cup portions and wrapped each portion tightly in cling-wrap and flattened to about the size of a deck of cards.


Out of eight large avocados I ended up with twelve pre-made packages of guacamole. 


To be used they just have to thaw in the fridge overnight.

To find out more about avocados and how to freeze them visit the California Avocado page by clicking HERE.


AVOCADO, BACON, AND EGGS

1 avocado
2 eggs
2 strips of pre-cooked, crumbled bacon

Cut the avocado in half and remove the pit. Scoop out enough avocado to make a hole that matches the size of your egg.

Stabilize avocado halves by balancing them upright, and level, on the top of a muffin tin. Crack an egg into each avocado half and top with crumbled bacon. I added a sprinkling of black pepper over ours, but you can season, or not season, as you choose.

Bake in a preheated 425 degree oven for 15 minutes or until eggs are cooked through.

Until next time...
~Rebecca

Recent and related posts that you might enjoy reading...


Tuesday, August 18, 2020

Putting Up Garden Produce

Today I was able to slow down, stay home, and put up garden produce...which was really nice. 💗


My husband picked everything yesterday.


I ended up putting up a gallon of banana peppers, three gallons of green peppers, and four quarts of tomatoes this morning.


My BFFF came over in the afternoon and rescued me with caffeine and chocolate. She also helped me snap green beans while we visited.

We were recently given a couple of bags of potatoes, so I decided to cut the potatoes up and add them to the beans. We ended up with a total of 14-quarts of green beans and potatoes.


I was also given some cucumbers at work last week, so I diced them up, added a couple of onions and a few other ingredients, and made a quart of cucumber salad. John and I had some of it with supper tonight and it was so good! 😋

It was wonderful getting to spend the day at home doing some of the things that I love most!

Until next time...
~Rebecca

Recent and related posts that you might enjoy reading...


Wednesday, March 18, 2020

Roasting Pumpkins in March

As part of putting into practice some of the measures that President Trump has asked Americans to practice during these interesting times in which we live, I am doing my part today by staying home, going through the house to see what's on hand, and making a list of what we need should we happen to find it next time we're out...which may not be for awhile. 

I know I need to focus on fresh foods first, so that's what I'm starting with. I just happened to have two small pumpkins left over from last October. 


One is orange; the other is white. Both have been sitting on a shelf in the kitchen all winter long and both are still good. I decided to do something with them first.


I had never seen the inside of a white pumpkin before. The 
flesh is beautiful and looks similar to fresh coconut. 


I decided to roast the pumpkins, so they are in the oven now. When they are done, and after they have cooled, I will puree the flesh and freeze it to be used at a later date in muffins, breads, etc.

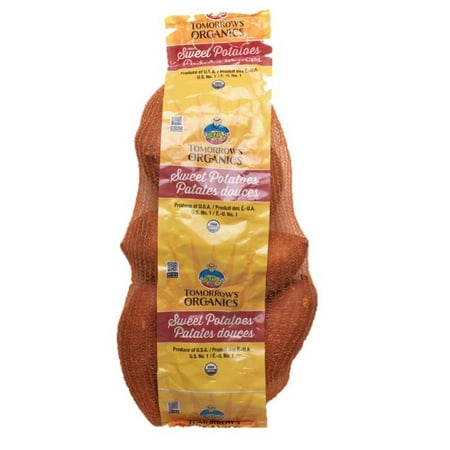
I also had a 3-pound bag of organic sweet potatoes that I had picked up last time we were out. I decided to throw them in the oven and roast them with the pumpkins. I will use them throughout the week as side dishes (baked or mashed), or I may turn them into a sweet potato pie. Either way, they will not go to waste.

Organic Sweet Potatoes, 3 lb Bag

I know it's a little odd and definitely out of season, but, if I still have pumpkins sitting around from last fall, some of you might, too, and you might be looking for a way to use them up, just like I am. 

Here are the instructions on how to roast and puree a pumpkin:

After cutting the pumpkin in half and removing the seeds, place on a large baking pan (skin side up; cut side down). Roast in a 375-degree oven for about an hour and fifteen minutes or until fork tender throughout. Scoop out the flesh from the skin and place in a food processor to puree. Once pureed, use fresh or allow to cool before placing in freezer bags.


What measures are you and your family taking during these difficult times? What do you have in your house? And how are you using it?

Until next time...
~Rebecca

Recent and related posts that you might enjoy reading...


Happy St. Patrick's Day!


Tuesday, February 6, 2018

My Thrifty Week - Post #9


Good morning, Sweet Ladies! ðŸ™‹ Welcome to 'My Thrifty Week' - Post #9! 

I'm so excited to be getting back to these posts and into thrifty-thinking mode again! With the final push towards debt-freedom, it's becoming a game to see where and when we can cut and it feels super good when we overcome and conquer in any given area, no matter how big or how small it might be!

Here are some of the things that happened this week that contributed to 'my thrifty week'...

- I was given a big bottle of Oil of Olay body wash by a friend. She had received it as a gift for Christmas and was unable to use it, so she decided to pass it on...which was great!!! I was nearly out of body wash and it was on my shopping list for the next trip out. Thankfully, I was able to cross that item off my list and save a few bucks! 

- Another friend occasionally passes on extra vegetables that she receives in her weekly organic meal shipments. Last week she gave me a half-head of cauliflower, a green pepper, and a package of celery. I used the cauliflower, green pepper, and half of the celery in a pan of roasted vegetables, to which I added carrots, an onion, and a half a can of baby corn that I had in the freezer. I drizzled the whole thing with olive oil and baked in a 450 degree oven until the vegetables were tender and slightly caramelized. Delicious!

Vegetable Cut Up, Drizzled with Olive Oil,
 and Ready to be Roasted
- We had almost a full half-gallon of milk left over (we don't buy regular milk, as a rule, so I'm not used to having it on hand, but we had bought this a while back to use in a specific recipe) and it was about to expire, so I used it and the other half of the package of celery and, adding a few carrots, an onion, and a box of instant potatoes that had been sitting on the shelf for a while, used them to make a pot of potato soup. It turned out well!

- My husband loves having vegetable broth on hand to use in soups, pasta, and other dishes that he prepares and we've been buying it regularly at Aldi's. I finally made a point to start saving my vegetable ends again and have just been popping them in a bag in the freezer. Once the bag is full, I will boil them altogether, strain the broth, put into containers, and freeze. There will no longer be a need to buy vegetable broth.

Vegetable Ends Saved For Broth

- When I got done cleaning the vegetables for roasted vegetables and saving the ends to freeze for broth, this is all the waste that remained to be disposed of...

Onion Skins - The Only Thing Not Saved For Broth

- One other thing that I did this week was make a double batch of one of my husband's favorite snacks...Protein Snack Balls. I still had a bag of sunflower seeds and a bag of chia seeds in the cabinet that really needed used up. We had cocoa powder and most of the other ingredients on hand. The only thing that we were out of was honey and chocolate chips, so I picked those up on our last trip to town and viola! Protein Snack Balls (most of which are in the freezer)! 😄 Here's the recipe for anyone that might be interested in making them...

PROTEIN SNACK BALLS

1/2 c. raw honey
1 c. natural peanut butter
1/2 c. melted coconut oil
3 1/2 c. regular oats
1/4 c. cocoa
1/2 c. chia seeds
1/2 c. unsalted, roasted, sunflower kernels
1/2 c. raisins, chocolate chips, coconut, or chopped nuts

Mix ingredients together, shape into 1-inch balls, and refrigerate until ready to serve. Delicious!


Well, Ladies, that's it for now. You all have a great day and feel free to inspire and encourage others by sharing your thrifty finds in the comment section below.

Until next time...
~Rebecca

Recent posts that you might enjoy...


Happy Homemaking Monday - February 5, 2018


Wednesday, January 31, 2018

Dollar-S-t-r-e-t-c-h-i-n-g, Cabinet-Clearing, Clean-Up-The-Food Project For January 2018 - Week #4 and Final Update


Good afternoon, Dear Ladies!

Can you believe it? It seems like the month (and year!) just started and now, here we are, the last day of January and we're 1/12 of the way through another year! Where on earth does the time go? It just seems to fly anymore!

Okay...so we've made it through the final week and a half of our Dollar S-t-r-e-t-c-h-i-n-g, Cabinet-Clearing, Clean-Up-The-Food Project for January 2018 and we feel that, overall, we've done pretty well. For the most part, we've managed to stay on track with menu plans and a lot of the food that had been on the shelf and in the freezer for quite some time is gone now. There is, however, a lot left still, but it's manageable. 

After discussing our options (we were going to do our grocery shopping tomorrow - on February 1st), but, in the end, decided to save an extra trip to town (40 miles round trip minimum) and I just went ahead and did our monthly February stock-up shopping when I took a friend shopping yesterday afternoon (on Tuesday). The menus were already in place, so it really didn't matter one way or the other...other than the fact that it would save time and money by eliminating a double trip...so...that being said...the house is full and we're ready to go into a new month with a new plan. 

The new plan for February, basically, consists of continuing to focus on clearing out the older stuff on a daily basis by scheduling weekly (or bi-weekly) food inventories, always concentrating on including items that typically tend to get overlooked if we don't stay on top of them...for instance...frozen tomatoes

We have several packages of beautiful, frozen tomatoes in the deep freeze, but do I think about them when I'm preparing to make spaghetti sauce or soup? Nope! I just grab a can of tomatoes off the shelf, open it, and go on. Almost every time...after it's too late, of course...I think, "Oh, shoot! I should have grabbed a bag of those tomatoes out of the freezer!" Continuing to purposefully do a weekly, or bi-weekly, food inventory will force us to look at and consider things like this on a regular basis and help us to get into the habit of keeping things moving ahead and being used up.

Another thing we have a lot of is potatoes. Again, we still have several quarts of frozen potatoes in the freezer (these are the potatoes that we were blessed with back in October). The answer to this one is easy. Other than an occasional, individually-wrapped, baking potato for certain meals, I'm not buying anymore potatoes until the frozen and canned ones that we have are gone!

Through the use of regular food inventories I am finally getting in to the habit of using up the last bits of fresh fruits and vegetables with little to no waste. For example, the last of last month's bag of apples were still good, but they weren't as nice and firm as they are when freshly purchased, so they were chopped up and thrown into muffins this week. The last of the fresh vegetables (and a few odds and ends that are frozen) will be chopped up, drizzled with olive oil, and baked in a hot oven until tender and roasted. Vegetable ends and peelings have been boiled and strained to make vegetable stock for soups and stews. This I either place in jars in the fridge to be used right away, or it, too, can be frozen and used at a later date. The thing is, though, to remember that it's in there. Thus, the need to do a food inventory on a regular basis.

You know...I really feel that we take food for granted in this country and that way too much of it goes to waste. On the other hand, a lot of what we eat isn't even fit to be put in our mouths, let alone sufficiently fuel our bodies. I have so much that I want to share with you all! I  will say this...I am working my way towards being a better steward of finances and making healthier food and lifestyle choices, and all that I learn along the way I want to share with you, but, it's too soon. 

Pray for me. I don't even know why I'm mentioning any of this at this time, but the Lord is dropping something down in my spirit and I know that it's big and that it's going to take time. It all has to do with finances, food, and physical (and spiritual) fitness. I've got a long way to go, Ladies. Just pray for me. 

Okay...I'm sorry...I've gotten off track in this post, but I'm leaving it as is. 

This was our second major food clean-up project within a year and, while I don't feel that we made as much progress with the second one as we did with the first one, we still did well. (Of course, we didn't have as much older stuff in the house the second time around as we did with the first, so I guess that counts for something!) Anyway, I will close here. 

Did anyone else do any kind of no-spend, low-spend, or general clean-up-the-food January? If so, please, feel free to share your experiences in the comment section below.

Until next time...
~Rebecca

Recent and related posts that you might enjoy reading...


Monday, October 23, 2017

31 Days of the Joys of Autumn - Celebrating the Harvest

Over the weekend we were blessed with a couple of bags of freshly picked green peppers and tomatoes from a family member's garden. I really didn't have the time or inclination to can them, so, when I got home from work last night I jumped right in and set to work on freezing them. 

Freshly Picked Green Peppers and Tomatoes
After going through the tomatoes, to make sure there weren't any bad spots, I threw them into the food processor, skins and all, and worked them up into fresh tomato sauce. I poured them into freezer bags that had previously been labeled and popped them right into the deep freeze. I ended up with four quarts of fresh tomato sauce. These will be added to soups, stews, or chili in the coming days.
Fresh Tomato Sauce
When I was done with the tomatoes, I started on the green peppers. I cleaned and halved some for stuffed peppers; others I cut into strips for stir-fry. Still others I chopped up small to be put in omelets and other dishes by the handful. I gave a few away and still ended up with six quarts of green peppers in the deep freeze. 

Green Peppers
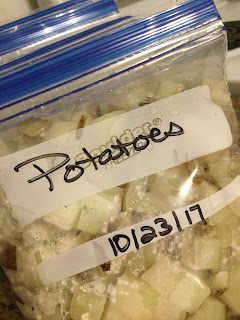
In addition to the green peppers and tomatoes, we have been blessed with an abundance of potatoes...100 pounds, in fact! I've given most of the potatoes away, but am getting ready to freeze what's left of the 20 pounds that we kept. I wasn't aware that you could freeze potatoes, but you can as long as you parboil them first. When I'm finished I should end up with about 15 pounds of potatoes in the freezer. All of these things will help carry us through the long winter months ahead, while saving on the grocery bill at the same time.

Celebrating the harvest is definitely one of the joys of autumn!

Until next time...
~Rebecca

Addendum...

Ended up with nine quarts of potatoes in the freezer.

Potatoes Ready For The Deep Freeze

Recent posts that you might enjoy:


Sunday, March 2, 2014

My Dollar-Stretching, Cabinet-Clearing, Clean-The-Food-Up Project For March - DAY 1 - 3/1/14


As food prices and utility bills continue to soar I have a renewed determination to cut expenses and get out of debt. In February we were able to finally pay off another credit card...one that has held us in bondage for over 12 long years! It felt so good to finally be rid of that beast and lesson learned! NEVER use a credit card to get a cash advance if you can't afford to pay it back immediately!

Over the past few days I've been making an inventory of all food on-hand...in the refrigerator, in the refrigerator-freezer, in the deep-freeze, the cabinets, and pantry and I am making March's menus based on said items. My goal in March is to spend as little as possible on groceries and put the money that would have been spent on them towards more immediate needs. It is ridiculous the amount of food that is in this house. I'm used to shopping for a big family and now that it's just John and I...well...like I said...it's ridiculous! Anyway...I implemented my plan yesterday and I hope to give you a day-by-day account of my progress. 

So...here goes with Day 1 of My Dollar-Stretching, Cabinet-Clearing, Clean-The-Food-Up Project For March...

DAY 1 - Saturday, March 1, 2014

* Since we have our own chickens we usually have plenty of beautiful brown and blue eggs on-hand, plus a friend of ours, who also had an abundance of eggs, gave us a dozen of her white ones. Another friend had given us a small package of home-grown and processed bacon back quite some time ago, and at the time I cooked it, I took the leftovers, crumbled them, and froze them as bacon bits for salads and whatnot. I still had a small package of them in the freezer. I also had two tortillas left over from the last time I made chicken enchiladas, so, since my husband is careful to keep his egg intake to a minimum and, generally doesn't eat meat...especially red meat (he does eat it, but very rarely and very sparingly)...I decided to take those last two tortillas and use them in breakfast burritos for myself. I had one for breakfast on the 1st and had the second one for breakfast this morning. My breakfast burritos consisted of one tortilla, a scrambled egg, half of the leftover bacon bits, and a slice of Borden's 2% sliced cheese on each. 

* I boiled six of the white eggs to be used as egg salad and/or deviled eggs later in the week.

* I had 6 turkey hot dogs in the refrigerator freezer, a pint of leftover frozen chili, and four frozen hot dog buns, so, for lunch, I made two chili dogs each for John and I and served them with an on-hand, partial bag of Chester's Cheese Puff Corn. The other two hot dogs I will use in something later in the week. 

* For supper I used fresh green peppers and brown rice and made a Stuffed Pepper Casserole. As always it was DE-LICIOUS! :)

* For a sweet treat I used the last three over-ripe bananas and the last of last year's pecans to make a simple Banana-Nut Cake topped with powdered sugar. It was yummy, too, and it will last for several days...unless we have company and then it will be offered up then with tea. :) 

* I also used the last three frozen containers of bits of saved, leftover vegetables (green beans, spaghetti squash, tomatoes, peas, celery, etc...I do this...I use little freezer containers and just add bits of leftover vegetables to them until they're full, then I start a new one...when there are enough, I make soup with them), an open quart of home-canned tomatoes, and odds and ends of fresh vegetables from the refrigerator (fresh zucchini, a quarter head of cabbage, a carrot, etc.), and 3/4 of an already cut-into onion to make a small pot of vegetable soup. Part of it will be eaten throughout the week (my husband could LIVE on vegetable soup...he loves it!) and part of it will be refrozen for quick lunches for him later in the month. 

That's day one of my Dollar-Stretching, Cabinet-Clearing, Clean-The-Food-Up Project for March. My plan is to report today's progress to you tomorrow.

Have a blessed week ahead and, for those in the areas impacted by these terrible winter storms, stay warm and stay safe! God bless all here!

All My Love,
~Rebecca

Sunday, June 26, 2011

RECIPE: Tomato Preserves

I got a request from a friend on Twitter this morning wondering if I had a recipe for 'tomato jam' and, while I'm not sure that this is exactly what she's looking for (if it is, here we call it 'tomato preserves'), here's what I've got. Lylah, this is for you!

TOMATO PRESERVES

1 tablespoon mixed pickling spices
1 piece ginger root
4 cups sugar
1 cup thinly sliced lemons (about 2 medium)
3/4 cup water
1 1/2 quarts Roma tomatoes (about 2 pounds)

Just cut a slice off the end of the tomatoes, but do not core. Tie spices in a cheesecloth bag; add to sugar, lemons, and water in a large sauce pot. Simmer 15 minutes. Add tomatoes and cook gently until tomatoes become transparent, stirring occasionally to prevent sticking. Cover and let stand 12 to 18 hours in a cool place. Remove spice bag. Drain; reserving syrup. Boil syrup 2 to 3 minutes or longer if too thin. Add tomatoes and lemon; boil 1 minute. Pour hot into hot jars, leaving 1/4-inch head space. Adjust caps. Process 20 minutes in boiling water bath. Yield: about 6 half pints.


Friday, May 20, 2011

Making Sauerkraut From A Vintage Family Recipe

"...And this is the finest Kraut I ever did eat. I am thinking of getting my self some cabbage and make some when we go to town make it this way and you wont regret it..." 
                                                      ~my great-aunt, Jessie McCann Martin

Grandma Maude's Handmade Binder

Among the many things that keep me connected to my grandmother (my dad's mother), Maude Belle McCann Brown Graham, is this treasured binder that she made in December of 1941 to house her, then new, Ball Blue Book, as well as other favorite family recipes in, among which is her sister, Jessie's, handwritten sauerkraut recipe. It's not only the recipe that my grandmother and Aunt Jessie used, but it's the recipe that my mother used, and the recipe that I have used since first learning how to can.

Dec. 1941 - Maude B. Graham - Birch Tree, MO

Grandma's 1941 Ball Blue Book

Yesterday we were blessed with three large heads of cabbage.

These were some of the biggest cabbages I've
ever seen and I think they were home grown!

They were too big to fit in our fridge, so this morning I set to work turning them into sauerkraut. Once again, I used Aunt Jessie's tried and true recipe.

Great-aunt Jessie's Handwritten 'Sour Kraut' Recipe

 Aunt Jessie's recipe reads as follows (and I quoted it word for word exactly the way Aunt Jessie wrote it)...

"...here is how I make my sour kraut I cut It with a cutter and then pack it tight In the Jars I use the handle of a butcher Knife and press it tight and dont leave no air holes In it and then I put a tea spoon salt to a qt or a table spoon  to a half gallon. and have a tea kettle hot boiling water and fill the Jar with hot boiling water and seal tight. and set the jars in a pan for they will spit out some. And this is the finest Kraut I ever did eat. I am thinking of getting my self some cabbage and make some when we go to town make it this way and you wont regret it..."

Using photos and a few further instructions of my own, I have decided to share Aunt Jessie's recipe here on HEARTH AND HOME...

After preparing the quart jars and tearing away the outer leaves of the cabbages (which were a real treat for our chickens), I set to work cutting one cabbage at a time into quarters, coring it, and slicing the quarters into food-processor-sized slices. 

Old glass mayonnaise jars work great for sauerkraut!

Slicing The Quarters

Preparing The Cabbage For Kraut

Alternately, I worked between slicing cabbage, running it through the food-processor, filling a big bowl with shredded cabbage, and packing it into clean jars.

The food-processor did a great job
of shredding the cabbage for kraut!

Shredded cabbage was everywhere!

Packing The Kraut Into Jars

You want it good and tight!

A wooden spoon helps to tamp it down.

Next, it was time to add salt...1 teaspoon per quart and boiling water to each jar. I'm not sure what kind of salt Aunt Jessie used, but I used regular Morton Canning and Pickling Salt.

Adding salt to each quart...

...and boiling water.

After that, the next step was to release the air bubbles. I did this by just running a regular table knife up and down the inside edge of each jar from top to bottom several times. After that I finished filling the jars to within a half-inch of the top with more boiling water.

Releasing The Air Bubbles

Adding More Hot Water To Fill

Then it was time to clean the rims of the jars and cap them with lids which had been kept on the stove in boiling hot water.

Cleaning The Rims Of The Jars

Capping The Jars

The final step in the canning process...at least this leg of it...was to rinse the jars and line up them up on the cabinet to admire their beauty.

Rinsing The Jars

The Finished Product (For Now Anyway)

I got eight, fully-packed quarts of sauerkraut out of the three heads of cabbage. While I was preparing the kraut, my husband was preparing a a cool, dry place under our house to store the kraut while it ferments. That is where it will stay for the next six weeks. After that we will bring it out, wipe the jars, refill any jars that are low on water, recap with fresh caps, and bathe them in a hot water bath for 30 minutes. After that, the sauerkraut will be ready to eat.

(This article is linked back to The Legacy of Home's 'Vintage Home Link-Up' page. Please visit it to find other great articles on 'vintage living'.)