Showing posts with label do-it-youself. Show all posts

Friday, April 26, 2024

The Basics of Homemade Cleaning Supplies

(Reprint of blog post dated Tuesday, March 8, 2011 with a few corrections or comments made along the way.)


I've made my own homemade cleaning supplies for many years and have never regretted it. Occasionally, I have slipped back into the convenience of purchasing ready-made laundry detergent, but am never as satisfied with it as I am with my own homemade. Even though I have shared some of these recipes before, I thought I'd share my basic cleaning supply list of homemade formulas with you today...


ALL-PURPOSE CLEANER
 Mix in a sprayer bottle:

1 T. ammonia
1 T. liquid laundry detergent
2 cups of water

This recipe costs virtually nothing to make and, in my opinion, works as well as, or better than, the 409 All-Purpose Cleaner that I used for years at almost $2.50 a bottle! 

(I'm sure that 409 All-Purpose Cleaner costs way more than $2.50 a bottle now!!!) 

HOMEMADE GLASS CLEANER

Mix in a sprayer bottle:

1 cup rubbing alcohol
1 cup water
1 tablespoon white vinegar
1 tablespoon ammonia

This is the best glass cleaner I've ever used and it's streak-free!

HOMEMADE CARPET FRESHENER

1/2 cup of borax
1/2 cup of baking soda
1 teaspoon of cloves and/or cinnamon (cloves help keep moths out of the closet too)

Or, if you've got pets, instead of the spices, use about 20-25 drops of sweet orange oil (I use the spices AND the orange oil), which is a natural flea repellent; be sure to mix in the oil into powder mixture thoroughly and never use directly onto your pets.

HOMEMADE LAUNDRY SOAP - LIQUID

1/3 bar Fels Naptha soap
½ cup Arm and Hammer Super Washing Soda
½ cup 20 Mule-Team Borax powder  
 
You will also need a small bucket, about 2 gallon size.

Grate the soap and put it in a sauce pan.  Add 6 cups water and heat it until the soap melts.  Add the washing soda and the borax and stir until it is dissolved.  Remove from heat.  Pour 4 cups hot water into the bucket.   Now add your soap mixture and stir.  Now add 1 gallon plus 6 cups of water and stir.  Let the soap sit for about 24 hours and it will gel.  You use ½ cup per load. 

(Note: The finished soap will not be a solid gel; it will be more of a watery gel. And the soap is a low sudsing soap. You won't see suds, but that's okay. Suds are not what cleans; it's the ingredients in the soap.) 

HOMEMADE LAUNDRY SOAP - POWDERED

2 cups finely grated Fels Naptha soap
1 cup 20 Mule-Team Borax
1 cup Arm and Hammer Super Washing Soda

Mix and store in a coffee can or what have you. Use 1 to 2 tablespoons per load.


HOMEMADE FABRIC SOFTENER

6 cups water
3 cups white vinegar
2 cups hair conditioner (the best I've found so far is Suave Ocean Breeze...Mmmmmm!) 

(I don't know if they even make Suave shampoo anymore...haven't even looked for it in years...but am re-thinking products like this anyway due to their liberal use of sodium lauryl sulfate. More on that at another time, but you might research it and check your ingredient lables.)

Use as you would any softener (I use mine in a Downy ball). It won't leave a residue on your clothing or towels. 

Well, these are just a few of the homemade products that we use in our home. I find their cleaning ability equal, or superior, to what you would typically purchase at the local retail stores, and only the Lord knows for sure how much money we've saved over the years since switching to these products.

Happy Cleaning!

~Rebecca

Recent and related posts that you might enjoy reading...

The Basics Of Homemade Cleaning Supplies (original post)

Tuesday, March 7, 2023

Thrift and Savings - Post #8 - Good Deals, Cash Back, and Recycling

Other than the winter food challenge updates, it's been a long time since I've done a post on thrift and savings. I wish I could remember all those thrifty little happenings and do regular thrifty posts, but I usually don't. I think it's important to encourage others in the area of finances, and will try to do better in the days ahead. 

Now, my friend, Laura Lane, over at Harvest Lane Cottage? She's amazing! She thinks of things to remember and record that I'd never even think of in the first place! If you get a chance, go over and check out her 'thrifty and frugal' posts on her blog. There is, indeed, a great wealth of good stuff in them!

Anyway...back to my own post... 

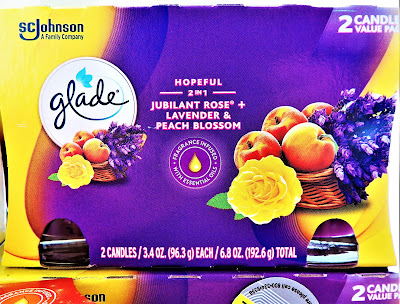
- Glade candles were on markdown at Dollar General last week for $2.70 each.


I got one single candle (Pumpkin Spice Things Up...I would have had two of them...two was all they had of that scent...but I dropped one and shattered it all over the store floor...I offered to pay for it, but the manager wouldn't let me) and I got four double packs of 2-in-1 Jubilant Rose + Lavender & Peach Blossom. They all smell soooo good! The rose/lavender/peach blossom ones smell super springy! The pumpkin one I will save for fall. 


That was a total of 9 Glade brand candles for $13.50.

- I had enough Amazon points to get 3 packages of 2 gel pen refills for free over the weekend.


I ordered ink for the blue pens this time. Usually, I order refills for the black and have even ordered refills for the red. This is my first time of refilling the blue. I love my G2 Gel Pens no matter what color they are!


- I started using Upside at the gas station in May of 2022. In less than a year (and I don't do that much driving) I have earned a total of $31.72 cash back (deposited directly into my bank account). To check out Upside for yourself (and to start saving money at the gas station) click HERE.

- A friend at work is always bringing me something to reuse or recycle...empty feed bags (made into totes), Christmas tins (to be refilled with cookies), etc. Last week he brought me an old sheet with bison on it. It had a tear in it, but he wondered if there was anything I could do with it...thought I might be able to figure out a way to recycle it. I did, but I'll share more about that project when I'm finished with it! 😉


Well, that's all for now. I hope your week is off to a great start and that all is well with you and yours. Have a great day!

Until next time...
~Rebecca

Recent and related posts that you might enjoy reading...

This post was shared on Grammy's Grid Unlimited Link Party - March 8, 2023. Check out Grammy's Grid by clicking HERE.


Monday, October 26, 2015

Homemade Natural Air Freshener

Ingredients For Making Your Own Natural Air Freshener

I love Fabreeze and have used several bottles of it over the years, but I do worry about the harmful effects of chemicals in products like this one, especially when using it on furniture and/or carpet where our skin touches it.

After reading an article about the dangers of Fabreeze this morning, I decided to try my hand at making my own natural air freshener and am quite pleased with the results. I decided to share the recipe here.

To make your own air freshener you will need:
  • 1 tbsp of baking soda
  • 2 cups of water
  • 10 drops of essential oil (I used lavender)
Mix the baking soda and essential oil in a bowl with a fork to keep the oil suspended in the water. Pour the mixture into a clean spray bottle and top off with the water. Shake before every use.

Blessing,
~Rebecca

Monday, October 5, 2015

Recipe: Taco Soup

Autumn is here and this cool, cloudy day has me thinking about warm soups, stews, and casseroles! One of our favorite soups of all time is Taco Soup and I've got a pot of it cooking on the stove right now!
Taco Soup

TACO SOUP

1 1/2 lbs. ground beef (I use ground turkey.)
1 envelope taco seasoning (I make my own. I'll share the recipe below.)
2 cans whole kernel corn, undrained
2 cans chili beans
2 cans diced tomatoes, undrained

Cook ground meat, add seasonings, corn, tomatoes, and beans. Simmer. Serve with tortilla chips and shredded cheese. Delicious! <3

HOMEMADE TACO SEASONING MIX

2 teaspoons instant minced onion
1 teaspoon salt
1 teaspoon chili powder
1/2 teaspoon cornstarch
1/2 teaspoon crushed dried red pepper
1/2 teaspoon instant minced garlic
1/4 teaspoon dried oregano
1/2 teaspoon ground cumin

Combine all ingredients in a small bowl until evenly distributed. Spoon mixture onto a 6-inch square of aluminum foil and fold to make airtight. Label. Store in a cool, dry place. Use within 6 months. Makes 1 package (about 2 tablespoons) TACO SEASONING MIX. To make additional packages increase ingredient amounts proportionately.

Tuesday, May 13, 2014

Hand-Crocheted Dish Cloths

Hand-crocheted Dish Cloths - Red, White, and Blue
A couple of years ago I made crocheted stockings for each one of the grandlittles as part of their Christmas, and, to make sure that each child knew which stocking was theirs, I made each one of them in a different color. I had tons of yarn left over and have been looking for cute, little projects to use it up on ever since. When I saw these sweet, little, hand-crocheted dish cloths on a friend's website I knew that I had found my next project.

The dish cloths are really simple to make, and they work great. They will save money, too, because I will no longer be purchasing germ-collecting sponges. I can use the cloths, then, throw them right in the washer and dryer. Awesome!

My friend, Laura, not only makes and uses the cloths herself, but says she gives the dish cloths, along with a large bottle of dish soap, for bridal shower gifts. Isn't that a great idea? To read her post about that, click HERE.

To make the cloths: Chain 21, then single crochet in the second chain. Single crochet to end of row. *Chain one and turn. Single crochet in the first stitch and continue to the end of the row. Repeat from * until you have a square cloth.
Hand-Crocheted Dish Cloths - Blues and Beiges

Happy Crocheting!

All My Love,
~Rebecca


One Thousand Gifts -

7) a bald eagle perched high in the top of a big, tall tree (and its nest!)
8) a nice telephone visit with my amazing and wonderful Aunt Doris out in Dodge City, Kansas
9) my purple irises 

Tuesday, May 6, 2014

Sauerkraut - Six Weeks In The Making


Finishing Up The Sauerkraut
Back in March, I shared a post with you about my daughter and I getting together to make sauerkraut. At the end of that post we had just put our freshly jarred kraut under the house to ferment for six weeks. We got together last Tuesday to finish the process.

We started out with 22 beautiful jars of fermented cabbage. When we brought them out from under the house, they were perfect!

We washed the outside of the jars, removed and cleaned the caps, refilled the jars with hot water (some always bubbles out during the fermentation process), recapped them, and processed the jars in a hot water bath.

I was a little disappointed, however, because, during the hot water bath process, we ended up losing four jars of kraut due to breakage. I know what happened to the first two jars (my own negligence), but I really don't know what happened to the second two. I'm wondering if, like everything else, they just don't make canning jars like they used to. Whatever the cause, a total of four jars broke during the hot water bath process and, in the end, we only ended up with 18 jars of finished sauerkraut.

We split the 18 jars between the two of us, giving each household nine jars of kraut to enjoy. Even at that, due to the fact that we don't eat it very often, the kraut will probably last both households for quite some time. I plan on getting some turkey bratwursts to enjoy a jar of ours with soon. Another thing that's good cooked and served with sauerkraut is a nice pork roast. Will have to think about that, too! :)

How do you and your family enjoy sauerkraut? Does anyone else out there make their own? If so, I'd love to hear about your experiences!

Until Next Time...
~Rebecca

You might also enjoy...

Putting Up Sauerkraut

Making Sauerkraut From A Vintage Family Recipe

#sauerkraut

Thursday, March 7, 2013

Recipe - Sweetened Condensed Milk Substitute

At my husband's request I went to make a low-fat cheesecake only to discover that I didn't have any sweetened condensed milk, so I Googled substitutes and found a recipe that sounded right. I tweaked it even more and came up with this tasty and healthier version. I will never buy sweetened condensed milk again.

SWEETENED CONDENSED MILK (Original Recipe)

1/3 c. boiling water
3 T. melted butter
3/4 c. granulated sugar
1 c. powdered milk

Mix all ingredients together until smooth. Allow to cool for 15 minutes before using.

SWEETENED CONDENSED MILK (Made With My Tweaks)

1/3 c. boiling water
3 T. melted Smart Balance
2/3 c. crystalized cane juice (Florida Crystals Organic Sugar)
1 c. powdered milk

Mix all ingredients together until smooth. Allow to cool for 15 minutes before using.

Monday, November 21, 2011

Good MONDAY Morning - 11/21/11 - Failed Yogurt Experience and Weight-loss Update

Good Morning, Dear Ladies! It's Monday! (I know some people hate Mondays, but I love them!)

I was up early this morning. Had the cats fed, the dog out, and the chickens fed, watered, and out just after daybreak. Since then I've been baking. Have made two pumpkin pies for tomorrow (an early Thanksgiving with my dad and a friend), a dozen muffins to freeze, and cornbread is baking in the oven now for lunch today.

Over the weekend I had a failed yogurt experience. I used my usual homemade yogurt recipe (and if anyone want to try it, please, read both of these articles before starting - Homemade Yogurt and Perfecting The Process) except, due to the fact that I haven't made yogurt in a while, I was out of homemade starter, so, this time, I tried a less expensive yogurt to use as my starter. I used Dannon-brand, plain, Greek yogurt instead of Oikos-brand, plain, Greek yogurt like I normally do. It didn't work!

When I got up Saturday morning, instead of having a crockpot full of nice, thick, homemade yogurt, I had slightly thickened yogurt-milk! Oh,no! I didn't want to waste it, so I went ahead and bottled it up into two quart jars. I've been using the yogurt-milk instead of regular milk in my baking...namely in the muffins and cornbread. It worked great! No flavor difference really...just a moister, creamier texture...quite good, in fact! Anyway, I wanted to share that with you all and tell you, if you try the homemade yogurt, please, be sure and use Oikos-brand, plain, Greek, yogurt as your starter...not something cheaper.

I've had several people ask me how the weight-loss is coming along. Well, when I first shared about my struggles with the weight-loss back in June of 2011 I was weighing in at 257 pounds (that was down 29 pounds from an all-time high of 286 pounds). At last check-in here (August of 2011) I was 8/10 of a pound away from reaching my next goal of 247 pounds. I have surpassed that one, met another, and am currently 2/10 of pound away from reaching my current goal of 225 pounds. When I hit 218 I will be halfway to the final goal from where my journey began. At my starting point I need to lose a total of 136 pounds; at present I am 76 pounds away from reaching that final goal.

 Well, my kitchen timer is going off and the cornbread is about ready to come of the oven, so I am going to close for now. I wish you all a wonderful Monday and a Happy Thanksgiving week! God bless all here!

All My Love,
~Rebecca

Saturday, June 25, 2011

Perfecting The Yogurt Making Process - Making Greek Yogurt

The Whey And Greek Yogurt

Back in March I shared the recipe that I have been using to make my own homemade yogurt. Other than when there was a lapse in time and I needed a new container of Oikos Greek Yogurt for fresh starter, I've not bought a container of store-bought yogurt since then.

Sometimes when I would make the yogurt it would turn out perfectly smooth and creamy. At other times it would turn out kind of grainy and very runny. I have no idea what made the difference. But the other day I was reading somewhere that to make Greek yogurt, you simply have to strain the whey (the liquid) off of the homemade yogurt, so I tried it and, boy! Am I ever happy with the results!

All I did was, overnight I made my regular recipe of homemade yogurt. This morning I lined a large colander with a clean, cotton towel (a smooth one...not a fuzzy one), and I set it atop a large bowl. I dumped the contents of the crockpot that the yogurt was in into the towel, covered it, and let it drain. As you can see above, after straining the liquid off, all that was left was the very thick, awesomely good, Greek-style yogurt that can be eaten alone, used as sour cream, served with fruit, or used to cook with in a multitude of recipes. 

I saved the whey as well. It is full of nutrients and, if you prefer a little creamier yogurt, you can always stir a little back into the yogurt, or you can add it into smoothies, etc.


Question: If you've ever made your own homemade yogurt, what did you do with the whey?


(This post was featured in The Legacy of Home's 'The Christian Home' - Issue 21 - June 27, 2011. Please visit Mrs. White's site by clicking HERE.)

Friday, May 20, 2011

Making Sauerkraut From A Vintage Family Recipe

"...And this is the finest Kraut I ever did eat. I am thinking of getting my self some cabbage and make some when we go to town make it this way and you wont regret it..." 
                                                      ~my great-aunt, Jessie McCann Martin

Grandma Maude's Handmade Binder

Among the many things that keep me connected to my grandmother (my dad's mother), Maude Belle McCann Brown Graham, is this treasured binder that she made in December of 1941 to house her, then new, Ball Blue Book, as well as other favorite family recipes in, among which is her sister, Jessie's, handwritten sauerkraut recipe. It's not only the recipe that my grandmother and Aunt Jessie used, but it's the recipe that my mother used, and the recipe that I have used since first learning how to can.

Dec. 1941 - Maude B. Graham - Birch Tree, MO

Grandma's 1941 Ball Blue Book

Yesterday we were blessed with three large heads of cabbage.

These were some of the biggest cabbages I've
ever seen and I think they were home grown!

They were too big to fit in our fridge, so this morning I set to work turning them into sauerkraut. Once again, I used Aunt Jessie's tried and true recipe.

Great-aunt Jessie's Handwritten 'Sour Kraut' Recipe

 Aunt Jessie's recipe reads as follows (and I quoted it word for word exactly the way Aunt Jessie wrote it)...

"...here is how I make my sour kraut I cut It with a cutter and then pack it tight In the Jars I use the handle of a butcher Knife and press it tight and dont leave no air holes In it and then I put a tea spoon salt to a qt or a table spoon  to a half gallon. and have a tea kettle hot boiling water and fill the Jar with hot boiling water and seal tight. and set the jars in a pan for they will spit out some. And this is the finest Kraut I ever did eat. I am thinking of getting my self some cabbage and make some when we go to town make it this way and you wont regret it..."

Using photos and a few further instructions of my own, I have decided to share Aunt Jessie's recipe here on HEARTH AND HOME...

After preparing the quart jars and tearing away the outer leaves of the cabbages (which were a real treat for our chickens), I set to work cutting one cabbage at a time into quarters, coring it, and slicing the quarters into food-processor-sized slices. 

Old glass mayonnaise jars work great for sauerkraut!

Slicing The Quarters

Preparing The Cabbage For Kraut

Alternately, I worked between slicing cabbage, running it through the food-processor, filling a big bowl with shredded cabbage, and packing it into clean jars.

The food-processor did a great job
of shredding the cabbage for kraut!

Shredded cabbage was everywhere!

Packing The Kraut Into Jars

You want it good and tight!

A wooden spoon helps to tamp it down.

Next, it was time to add salt...1 teaspoon per quart and boiling water to each jar. I'm not sure what kind of salt Aunt Jessie used, but I used regular Morton Canning and Pickling Salt.

Adding salt to each quart...

...and boiling water.

After that, the next step was to release the air bubbles. I did this by just running a regular table knife up and down the inside edge of each jar from top to bottom several times. After that I finished filling the jars to within a half-inch of the top with more boiling water.

Releasing The Air Bubbles

Adding More Hot Water To Fill

Then it was time to clean the rims of the jars and cap them with lids which had been kept on the stove in boiling hot water.

Cleaning The Rims Of The Jars

Capping The Jars

The final step in the canning process...at least this leg of it...was to rinse the jars and line up them up on the cabinet to admire their beauty.

Rinsing The Jars

The Finished Product (For Now Anyway)

I got eight, fully-packed quarts of sauerkraut out of the three heads of cabbage. While I was preparing the kraut, my husband was preparing a a cool, dry place under our house to store the kraut while it ferments. That is where it will stay for the next six weeks. After that we will bring it out, wipe the jars, refill any jars that are low on water, recap with fresh caps, and bathe them in a hot water bath for 30 minutes. After that, the sauerkraut will be ready to eat.

(This article is linked back to The Legacy of Home's 'Vintage Home Link-Up' page. Please visit it to find other great articles on 'vintage living'.)

Monday, March 21, 2011

Recipe - Homemade Air Freshener


Homemade Air Freshener

15 to 20 drops of pure essential oil (I used lavender)
1/2 cup white vinegar
1 1/2 cups water

Mix and store in a spray bottle.

Recipe - Homemade Soft Scrub


Homemade Soft Scrub

Use to clean porcelain sinks and tubs and stainless steel sinks. This stuff works great!

2/3 cup water
1/4 cup Castille soap
1 3/4 cup baking soda
2 tablespoons white vinegar

Mix together and store in a clean squeeze bottle.


(Note: I just used a hand-held grater to fine grate the Castille soap.)

Saturday, March 19, 2011

Homemade Yogurt


I just got done making my first batch of homemade yogurt and it turned out awesomely good! Thanks to my friend, Carla, who shared the recipe, I no longer have to buy yogurt or sour cream! Here's what I did...

The recipe called for whole milk, but I used a 1/2 gallon of 2% milk. I turned the crockpot on low and poured in the half gallon of milk and let it heat on low for 2 hours and 45 minutes.

Then I turned the crockpot off, unplugged it, and let it cool with the lid on for 3 hours.

After three hours, I took out 2 cups of the warm milk and put it in a bowl. To that I added 1 cup of Stonyfield's Oikos Plain Organic Greek Yogurt (the yogurt needs to be plain and have live active cultures) and whisked it all together.


Next, I poured the yogurt-milk mixture back into the crockpot of warm milk and whisked it all together. After that I wrapped the whole crockpot in a triple-layer of large bath towels and went to bed. According to the original instructions the yogurt has to culture overnight (8 to 12 hours).

This morning...I had yogurt! Two beautiful quarts of homemade yogurt, plus enough starter (1 cup) to make my next batch! I just got done jarring it up into glass jars and putting it in the fridge where it needs to set for another 8 hours before eating (I did taste it though and it tastes delicious...just like the store-bought stuff)!


Now all I have to do is pick up another 1/2 gallon of milk and I'm on my way to making my next batch! I'm going to try using skim milk next to see if I can't come up with a 'fat-free' yogurt. 

The total work time involved in this process was between 5 and 10 minutes and the savings is substantial. On a regular basis we go through 3 to 4 containers of yogurt a week at around $3.00 a container, plus sour cream...another $2.50 to $3.00 (I discovered last night that the Oikos Plain Greek Yogurt truly does taste just like sour cream. I had heard that before, but had never tried it, and it's so much better for you...YUM!).

Anyway, based on what I just did, it should save us well over half of what we normally spend for these products, and the yogurt can be flavored up anyway you want it...vanilla, fresh fruit, whatever.

If anyone else out there tries it, please, write to me and share your experience with it!

Wednesday, February 16, 2011

Cute Baby Shower Idea From LITTLE BIRDIE SECRETS

I ran across this cute baby shower idea while looking through some of my favorite blogs. I thought I'd pass it on here...

Click Here To Get Instructions

Sunday, February 13, 2011

Valentine Necklaces

I just whipped up these little valentine necklaces for the little ones who will be attending the homeschool Valentine's Day party tomorrow. As soon as I can I'm going to sit down and write out my pattern.

Thursday, February 10, 2011

Monday, May 24, 2010

Recipe For All-Purpose Cleaner

I got a request for this, so I am reposting it...

ALL-PURPOSE CLEANER

 Mix in a sprayer bottle:

1 T. ammonia
1 T. liquid laundry detergent
2 cups of water

This recipe costs virtually nothing to make and, in my opinion, works as well or better than the 409 All-Purpose Cleaner that I used for years at almost $2.50 a bottle!

Wednesday, May 19, 2010

Making Croutons and Seasoned Breadcrumbs

It's a rainy day and afternoon Bible study has been canceled, so  I am using the time to catch up on a few projects around the house that have needed doing for a long time. So far I have made a double batch of laundry detergent, made up a batch of glass cleaner and one of all-purpose cleaner, and now have a batch of homemade croutons baking in the oven. I always save the odd and end bread ends that come along and keep them in the freezer until I have enough to make up a bunch of croutons breadcrumbs. Here's the recipe that I use:
CROUTONS
AMOUNT: About 12 Cups
Mix together well and bake in a single layer in shallow pan at 300 degrees F. until crisp, about 20 - 30 minutes; stir and rearrange, as needed, for even toasting:
1 1/2 lbs. bread, cubed
1 stick melted butter
1/8 teaspoon garlic powder (mix with butter)
favorite seasonings to taste (I use basil and parsley)